Google has ported Google Earth to the iPhone or iPod touch, and it’s such an impressive app that it deserves an Apple ad of its own.
The interface for Google Earth will be familiar instantly to anyone who has used an iPhone for more than a couple of hours. Upon launching the app, you see a photo of the Earth from space. To zoom in, you can either double-tap or use the “reverse-pinch” gesture on the screen. Swiping a finger left, right, up, or down moves the display in the chosen direction, and a two-finger rotation turns the display clockwise or counter-clockwise. There are icons on the display (see screenshot at right) for search, using your current location, changing settings, and realigning the display to North.
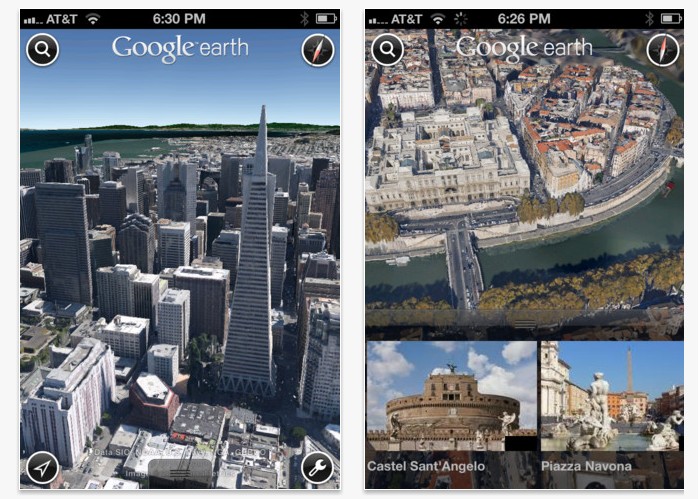
Things get more interesting when you tilt your iPhone; the display goes from a flat, satellite-eye view to a 3D-like image. If you’re near mountainous terrain, you get a true sense of the topographical features of the land. On many screens you’ll see Wikipedia icons, which link you to related Wikipedia articles.
Google Earth lets people virtually fly around a 3D view of the world made from satellite and aerial imagery mapped onto the planet’s mountains and valleys. The iPhone version reproduces this core experience, downloading imagery from Google’s servers as the perspective shifts and dotting the map with landmarks, photos, and other information. iPhone’s multitouch screen actually made using the application easy. Dragging a fingertip across the screen slides the view appropriately, of course. Two-finger pinch gestures not only zoom in and out, but also, by adding a little twirling rotary motion, steer the view’s orientation in one direction or another.
What’s new in this version: Version 3.2 improved performance and include bug fixes.
How to Use Google Earth Street View on an iPhone:
The Google Maps built-in iPhone application makes it possible to plan your trip, learn public transit scheduling information and find your current location. With the Maps app, you can even use the Street View feature, just like you would with Google Maps on your desktop computer. Use the Street View tool to get a more in-depth look at addresses and locations on your iPhone.
Step 1
Tap the “Maps” icon on your Home screen. The program will load.
Step 2
Tap the “Search” tab on the bottom toolbar.
Step 3
Enter an address or business name in the search field at the top of the page.
Step 4
Tap the “Search” button. The application will load the information you requested and render search results as dropped pins.
Step 5
Tap a pin to select it. The physical address or business name and icon options will appear above the pin. Tap the orange “Street View” icon to launch the option. Tap the blue “Info” icon to go to the address’s Info page.
Step 6
Turn your iPhone so it is in landscape orientation. Place your finger on the touch screen and swipe to the left to pan the Street View right. Swipe right to pan back left. You can also use the touch screen to tilt up and down.
Step 7
Tap a street guide arrow to move the street view in the direction the arrow is pointing.
Step 8
Double-tap to zoom in once. Double-tap again to zoom out.
Step 9
Tap the touch screen once to bring up the on-screen controls.
Step 10
Tap the “Done” button on the on-screen controls toolbar to exit Street View.