Hard Drive Compatible

I’m reinstating a very old computer I once used back in the days as use for a spare computer and I’m in need of a new hard drive.

I was wondering if all SATA hard drives are compatible with my computer since I consider myself barely computer savvy.

MB: GIGABYTE GA-M61PME-S2P AM2+/AM2 NVIDIA GeForce 6100 Micro ATX AMD Motherboard

PSU: APEVIA WIN-500XSPX 500W ATX12V / EPS12V Power Supply

I’m also wondering if my Nvidia Geforce GT 220 would work on this too since I just upgrade to another GPU on my main computer.

I don’t need those 250+ GB hard drives, just wondering if I can just go around and buy a cheap one just to make this computer functional.

I also have the OS CD available,both xp,visa and 7.(not pirated,they’re legal versions)

If I get a answer soon, I’m looking to buy this:

NIB HP 80GB SATA HDD Seagate Barracuda 7200 rpm
Brand new in factory wrap HP Seagate Barracuda 80GB SATA HDD. These drives are compatible with many HP servers including the Proliant ML110. This item is guaranteed not DOA and has never been installed in a server. These were spare drives and would be perfect for increasing the storage capacity in your HP server.

Any advice, or recommendations are welcomed. Have a nice day.

Your motherboard has SATA 3GB and PCIe X16 slot so any SATA HDD should work and your GT220 should work just as well. Your PSU although not the best will drive this fine.

Read More

New Secondary SATA Hard Drive not Recognised

I have installed a second HDD in Win7 – a WD caviar green. I couldn’t see it at all but have sorted it via diskmgmt.msc and can see it there. When I go into ‘Computer’ it’s not there. I can list the directory using command prompt and can even see it if I go into start:search and usr its drive letter (R. I can even open a word document and save it as Rnnnn and then open it again from Rnnnn. How can I get the drive letter to appear when I go into ‘Computer’? I note that in diskmgmt it is shown as ‘New Volume(R’ and I think that as it’s been intialised, formatted, etc.. it should not be classed as ‘New Volume’.

Go to diskmanagement, and report back the info you see there. In the bottom graphic section, you should have 2 HDD listed, one is Disk 0 which should be your system drive. In the Disk box to the left of the Volume strip, it should say Disk 0, System, Active, Boot, Page file, Primary Partition.

Below that should be your WD Green drive. I’m assuming it has been formatted with NTFS. In the Disk box, it should be Disk 1, Basic, Online.

In the volume section to the right, it should say “New Volume” because you haven’t given it a “Friendly Name” yet, and probably does not have a drive letter assigned to it. Right click in this area, and give it a name, like “BackUp” and then assign it a drive letter, like “K”, one that is not assigned to another drive. If it hasn’t be formatted, you can do it there from the context menu. Formatting places the NTFS file system on the drive, and will wipe out any data you have on the drive. When all done, it should read xx GB, NTFS, Healthy (Pimary Partition).
With the “Friendly Name” and drive letter assignment, it should show up in the Windows Explorer just like you system drive.

All the above has been done -the volume is ‘New Volume (R, Layout simple, Type Basic, File System NTFS, Status Healthy (Primary Active Partition)… capacity 100% free.

Not sure if that solved the problem or not. Is there anything on this new WD Green drive?

The information you list here makes me think this disk was installed as a Dynamic drive. The Layout Simple is a Dynamic Disk Configuration, and this drive should Not be an Active Partition.

Consider disconnecting this new WD HDD, and make sure your Windows 7 works properly without it. With your computer off, just unplug the power plug from the back of the drive temporarily and boot up.

If all OK, consider starting over with it. In DiskMgmt, make sure you selected the secondary drive, then delete the volume, and reformat it with NTFS. It should be a Basic Disk.

When finished give it a friendly name and a drive letter. Don’t mark it as Dynamic or Active.

Then it will show up as a NamedDrive with a DriveLetter in Windows Explorer

I have done as you suggested and started over again – with the same outcome. The Disk Management screen gives me the following :

Drive Layout Type FileSys Status
Disk 0 C : Simple Basic NTFS Healthy, Boot, Page file, Crash dump, Primary Partition
(online)

Disk 1 R : Simple Basic NTFS Healthy, Primary Partition
(online)

I can’t see any reference to ‘Dynamic’ or ‘Active’.

The R: disk is usable but just does not show up in Windows Explorer when I click onto Start : Computer.
Just to prove the point that it is installed, I did the following :

I used DOS command prompt and entered R:\>dir which returns ‘Volume in drive R is New Volume : Volume serial number is 040f- A62B : File not found. So the drive is there and recognisable.

If I click on start/computer I have the title ‘Hard Drives 1’ with just my C drive displayed (no sign of the R: drive), and this is the problem.

While still in Start/Computer, if I click on the top command line (where it says ‘computer’) and enter R: I get the contents of the new volume displayed – ‘$RECYCLE BIN’ and ‘System Volume Information’.

If I create a Word document I can save it to the R: disk (by entering ‘save as: R:nnn) and can retrieve and delete it.

It doesn’t make sense to me.

The new HDD disk status looks good and it does have an NTFS file system. It just does not have the assigned drive letter visible and no friendly name.

When you check in DiskMgmt, in the lower graphic section, does your system drive C: have just one large partition, or when you installed Win-7 did it place the 100MB (system reserved) partition first that says “system, active, primary partition”? There has to be an active partition, where the BIOS looks first for the OS.

Also, do you have a DVD or CD attached to this computer, that shows up in “Computer”, or in DiskMgmt?

In regard to the new green drive, check on two things. In the Disk status area, where it says Disk 1, right click and see if there is a choice of “change to dynamic disk, or change to basic disk” there. That should tell you if it was set up as a basic (static) disk, or a dynamic disk.

Also I wonder if it could have been set up as a mounted drive, pointing to an empty folder on the C: drive. So in DiskMgmt, click on the volume area of this drive, to the right of Disk 1, and right click for the context menu. Choose change Drive letter or path, and choose a different drive letter for it, like S. Then click on properties, and on the General Tab, give it a “friendly name” like BackUp Disk, or whatever.

See if that will cause proper identification of the drive.

I followed your suggestions. I’ve tabulated the actions, below:

1. In diskmngt the lower graphic section has –

Disk 0, C: and the drive has –
System reserved 100mb NTFS (healthy, active, Primary Partition) and
934.41gb NTFS, Healthy (boot, Page file, crash dump, Primary partition)

Disk 1, R: and the drive has –
4563.63gb NTFS, Healthy (Primary partition)

2. The DVD attached to this computer shows up in “Computer” as – C: DVD r/w drive
and in DiskMgmt as CD-ROM 0 DVD (D: ) No Media

3. In the Disk status area, where it says Disk 1 it says “convert to dynamic disk”

4. As suggested I have successfully changed the drive letter to ‘S’ and the name to ‘General Storage’

……………..AND BINGO !!!!!! I can now see the S Drive!

Read More

SATA Hard Drive Detected As IDE

Hello, I have a problem with my Western Digital Caviar Blue 500GB SATA 3.0 hard drive.  When i Run Speccy it detects my hard drive as an IDE.. and because of this the S.M.A.R.T. Function is not detected but when i go through my Bios setup, it says [Enabled].. How Can This be? did i do something wrong? Do i need to reinstall my OS?

My MOther Board is a GIGABYTE GA-M68MT-S2P
My other PC specs are:
4GB DDR3 PC1333 ram
AMD Athlon II X4 640
Sapphire 6770 1GB DDR5..

oh and i have one dvd drive i think its Lite on Lightscribe.. it is also sata. Please..i really cant solve this problem.

You should be able to change it to ACHI mode in BIOS without reinstalling. This error might occur but here is the fix: http://support.microsoft.com/kb/922976

Read More

WD is now shipping the world’s largest capacity (3TB) SATA hard drive

WD 3TB Sata Hard Drive
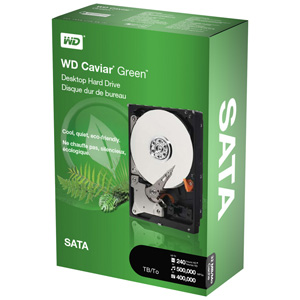
Oct. 19, 2010 – WD today announced that the company is shipping the world’s largest capacity SATA hard drive. As the latest addition to its WD Caviar® Green™ family of SATA hard drives, the new hard drives deliver up to a massive 3 terabytes (TB) of storage capacity on a single drive. WD is leading the industry in capacity for SATA hard drives by utilizing 750 GB-per-platter areal density and Advanced Format (AF) technology.

WD Caviar Green drives are an eco-friendly storage solution with WD GreenPower Technology™, which reduces power consumption by enabling lower operating temperatures for increased reliability and decreases acoustical noise for quiet operation. The WD Caviar Green 2.5 TB and 3 TB hard drives are designed for use as secondary external storage and next-generation PC storage in 64-bit based systems.

Drives with capacities in excess of 2.19 TB currently present barriers for PC hardware, firmware and software. To satisfy the new set of requirements of which users must be aware to successfully integrate larger capacity drives, WD is bundling its WD Caviar Green 2.5 and 3 TB hard drives with an Advanced Host Controller Interface (AHCI)-compliant Host Bus Adapter (HBA), which will enable the operating system to use a known driver with correct support for large capacity drives. For more information on solving the 2.19 TB drive barrier, please see the WD information sheet at http://products.wdc.com/largecapacitydrives.

“WD remains a leader of hard drive capacity and low power innovation. With our WD Caviar Green drives, we enable energy-conscious customers to build systems with the highest capacities that deliver the optimal balance of system performance, ensured reliability and energy conservation, Customers will be able to take advantage of this breakthrough capacity point now for secondary external storage in legacy 32-bit systems that run on Microsoft® Vista® or Windows® 7 platforms.” said Jim Morris, executive vice president and general manager of WD’s client systems storage group.

Price and Availability
WD Caviar Green 2.5 TB hard drives (model number WD25EZRSDTL) and 3 TB hard drives (model number WD30EZRSDTL) are available now in the U.S. at select resellers and distributors. MSRP for the WD Caviar Green 2.5 TB hard drive is $189.00 USD and the 3 TB hard drive is $239.00 USD. WD Caviar Green hard drives are covered by a three-year limited warranty. More information about WD Caviar Green hard drives may be found on the company’s website at http://www.wdc.com/en/products/Products.asp?DriveID=866.

Read More

What is the length of cable that I can use with a Serial ATA drive?

SATA Data Cable Serial ATA cables are available in many lengths up to 1 meter. Minimum cable length is 12 inches, using shorter cables can cause timing, or noise interference on the cable. The same conditions apply to cables that are too long. Though the Serial ATA specification calls out supporting cable lengths up to 1 meter or 39.37 inches, PCB traces from the cable connection to the host and drive controllers ASIC, adds length to the bus.

Example: SATA drive installed with a 40 inch cable. PCB trace from Serial host connector to the serial hosts ASIC = 3 inches. The same 3 inch PCB trace applies to the hard disk. This configuration gives you a bus length of about 46 inches. If you are having performance or data corruption issues, try using a shorter cable or different manufacturer of cable. Cable quality can vary between vendors.

Read More

WD VelociRaptor – The Only 10,000 RPM SATA Hard Drive On The Market

WD VelociRaptor WD® announced that it is now shipping WD VelociRaptor® 450 GB and 600 GB hard drives, the next generation of its 10,000 RPM SATA family of hard drives. The new WD VelociRaptor hard drive is designed for blade servers, high-performance PCs, Mac® computers, professional workstations, as well as 1U and 2U rack servers that require a balance of high performance and capacity. As the only 10,000 RPM SATA hard drive on the market today, and a favorite amongst enthusiast and enterprise groups, the WD VelociRaptor hard drive now comes packed with twice the capacity and up to 15% performance increase over the previous generation.

The most popular hard drive for high-performance enthusiasts who demand the ultimate SATA drive, the WD VelociRaptor hard drive is built with enterprise-class mechanics that provide 24×7 durability under high-performance demands and packs up to 600 GB of capacity into a 2.5-inch enterprise form factor. The WD VelociRaptor drive is also available in the IcePack™* enclosure, a 3.5-inch mounting frame with a built-in heat sink – a factory customization that fits the drive into a standard 3.5-inch system bay and keeps this powerful drive extra cool when installed in a high-performance desktop chassis and 3.5-inch HDD form factor enterprise chassis.

“WD is a leader in the performance and reliability of enterprise SATA hard drives, Demand for performance combined with an increase in capacity continues to rise and WD is the leader in this category. WD customers can rely on the new WD VelociRaptor to deliver high performance under the harshest conditions, while continuing to keep user data safe.”  – said Tom McDorman, vice president and general manager of WD’s enterprise business unit.

Features of WD VelociRaptor hard drives include:

  • Killer speed– SATA 6 Gb/s interface and 32 MB cache enhance the next generation 10,000 RPM WD VelociRaptor making it up to 15% faster than the award-winning previous generation.
  • Monstrous capacity – WD VelociRaptor SATA drives are available in capacities up to 600 GB, double the capacity of the previous generation.
  • Rock-solid reliability – Designed and manufactured to mission-critical enterprise-class standards to provide enterprise reliability in high duty cycle environments. With 1.4 million hours MTBF, these drives have the highest available reliability rating on a high capacity SATA drive.
  • Ultra-cool operation – Consumes no more power than the previous generation WD VelociRaptor while offering double the capacity and higher performance.
  • IcePack mounting frame – The 2.5-inch WD VelociRaptor is enclosed in a backplane-ready 3.5-inch enterprise-class mounting frame with a built-in heat sink that keeps this powerful little drive extra cool when installed in high-performance desktop chassis.
  • Rotary Acceleration Feed Forward (RAFF™) – Optimizes operation and performance when the drives are used in vibration-prone, multi-drive chassis.
  • NoTouch™ ramp load technology – The recording head never touches the disk media ensuring significantly less wear to the recording head and media as well as better drive protection in transit.
  • Environmentally conscious – In addition to being ROHS compliant, this generation of WD VelociRaptor is also a halogen-free design.

Price and Availability:

WD VelociRaptor (model WD4500HLHX and WD6000HLHX – 3.5-inch version with IcePack) hard drives are available now at select distributors and resellers. WD VelociRaptor 2.5-inch hard drives (model WD4500BLHX and WD6000BLHX) are under evaluation with OEM customers and will be available through select commercial distributors within this quarter. Manufacturer’s Suggested Retail Price (MSRP) for the WD VelociRaptor 450 GB (model WD4500HLHX) is $299 USD and the 600 GB (model WD6000HLHX) is $329 USD. WD VelociRaptor Online Stores

Related Links:

Read More

Serial ATA (SATA) data cable lengths

SATA Data Cable Lengths Serial ATA cables are available in many lengths up to 1 meter. Minimum cable length is 12 inches, using shorter cables can cause timing, or noise interference on the cable. The same conditions apply to cables that are too long. Though the Serial ATA specification calls out supporting cable lengths up to 1 meter or 39.37 inches, PCB traces from the cable connection to the host and drive controllers ASIC, adds length to the bus.

Example: SATA drive installed with a 40 inch cable. PCB trace from Serial host connector to the serial hosts ASIC = 3 inches. The same 3 inch PCB trace applies to the hard disk. This configuration gives you a bus length of about 46 inches. If you are having performance or data corruption issues, try using a shorter cable or different manufacturer of cable. Cable quality can vary between vendors.

Read More

Install and Troubleshoot Serial ATA (SATA) Hard Drives in a Macintosh

Sata Hard Drive Serial ATA interface disk drives are designed for easy installation. It is not necessary to set any jumpers, terminators, or other settings on this drive for proper operation. The jumper block adjacent to the SATA interface connector on SATA 150MB/s drives is for factory use only.  The jumper block adjacent to the SATA interface connector on SATA 300MB/s drives can be used to force the drive into SATA 150MB/s mode for use with older SATA controllers that only work with SATA 150MB/s drives.

With a Serial ATA interface, each disk drive has its own cable that connects directly to a Serial ATA host adapter or a Serial ATA port on your motherboard. Unlike Parallel ATA, there is no master-slave relationship between drives that use a Serial ATA interface.

You can use a Serial ATA drive in the same system with Parallel ATA drives as long as both interfaces are supported on the motherboard or with a host adapter. This makes it easy to add Serial ATA compatibility to your existing system without removing existing Parallel ATA disk drives.

What You Need?

  • A Phillips screwdriver and four 6-32 UNC drive mounting screws.
  • A Serial ATA interface cable (sold separately). Maximum length is 39 inches (1 meter).
  • A Serial ATA-compatible power cable or adapter (sold separately).
  • A system with a motherboard that has a Serial ATA connector on it, or a Serial ATA host adapter and available PCI slot in which to install the adapter.

Refer to your computer system documentation to see if your system supports Serial ATA on the motherboard and to locate the Serial ATA connector. If your system does not have a Serial ATA connector on the motherboard, you must purchase a Serial ATA host adapter that is compatible with your computer and operating system and install it with the appropriate device driver according to the host adapter manufacturer’s installation instructions.

Handling Precautions

  • Disc drives are fragile. Do not drop or jar the drive. Handle the drive only by the edges or frame. Keep the drive in the protective anti-static container until you are ready to install it to minimize handling damage.
  • Drive electronics are extremely sensitive to static electricity. While installing the drive, wear a wrist strap and cable connected to ground.
  • Turn off the power to the host system during installation.
  • Do not disassemble the drive. Doing so voids the warranty.
  • Do not apply pressure or attach labels to the circuit board or to the top of the drive.

See your Power Mac or Macintosh Server documentation for information about internal storage options and installation instructions.

Note: You must purchase and install a Mac OS-compatible Serial ATA host adapter into an open PCI slot to install this drive in your Macintosh.

Mounting the Drive

  1. Turn off your computer.
  2. Open your computer case (See your computer manual for instructions).
  3. Slide your new drive into an open drive bay.
    Orient the drive with the drive label facing up and the PCB facing down. You may find it easier to attach cables to your new drive before installing it. If so, follow the cabling steps below, and then return to this step to install the drive.
  4. Use four (4) mounting screws to secure your drive.
    If you want to mount your new Seagate drive in a 5.25-inch drive bay, you must purchase drive rails at a computer supply store.

Attaching the Cables

  1. Attach the cables to your new drive.
    Attach the Serial ATA interface and power-adapter cables. Connect either end of the interface cable to the drive. Both connectors are keyed the same to ensure proper orientation. You can connect only one end of the power-adapter cable to the drive. That connector is also keyed to ensure proper orientation.
    Note: Do not disturb the power and interface cables that are attached to your existing drive.
  2. Attach the Serial ATA interface cable to your computer.
    Connect the open end of your Serial ATA interface cable directly to your motherboard if your computer supports Serial ATA. If not, you must have an open PCI slot on your motherboard into which you install a Serial ATA host adapter (sold separately).
  3. Connect your power-adapter cable
    Connect the open end of the Serial ATA power-adapter cable to any available connector from your computer’s power supply. If none is available, you can purchase a Y-adapter cable to convert any one existing power connector into two, one of which you can use to power your new drive.

Initialize Your Drive

Use one of the following Apple utilities to initialize your new drive:

Mac OS X
Use Apple’s Disk Utility application.

Mac OS 9
Use Apple’s Drive Setup application.

These applications are normally located in your Applications/Utilities folder.

Note: DiscWizard is a PC (Windows/DOS) application. You do not need DiscWizard to install your drive in a Macintosh system.

Troubleshooting

If your drive is not working properly, these troubleshooting tips may help solve the problem.

  1. Does the drive spin up?
    A spinning drive produces a faint whine and clicking noise. If your drive does not spin, check that the power connector and interface cable are securely attached.
  2. Does the computer recognize the drive?
    Verify that the drive is enabled in the system CMOS or setup program. If not, select the autodetect option and enable it. If your drive has a problem, it may not be recognized by the system. If the operating system does not recognize the drive, you need to load your host adapter drivers.
  3. Why does my computer hang on startup?
    Verify that your system is Serial ATA compatible. You need either a Serial ATA 1.0-compatible motherboard connector or Serial ATA host adapter to use this drive.
Read More