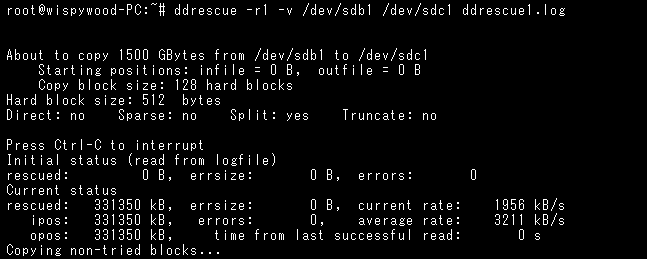
ddrescue (GNU ddrescue) is a data recovery tool for Linux and other Unix-like systems. It copies data from failing or damaged storage devices (hard drives, SSDs, flash drives, optical media) while intelligently handling read errors, retrying bad sectors, and recovering as much data as possible.

Key Features
| Feature | Description |
|---|
| Error-tolerant copying | Continues reading after errors, logs bad sectors, and retries them later. |
| Log file support | Saves recovery progress to a log file, allowing resumption after interruption. |
| Multi-pass recovery | First pass copies good sectors quickly; subsequent passes retry bad sectors with smaller block sizes. |
| Selective recovery | Can recover specific ranges of sectors (e.g., only partitions, or skip areas). |
| Read modes | Supports direct I/O, cached reads, and different device access methods. |
| Reverse direction | Can read from the end of the device toward the beginning (useful for optical media). |
Common ddrescue Commands
| Command | Description |
|---|
ddrescue -f /dev/sda /dev/sdb logfile | Clones failing disk sda to sdb, saving progress to logfile. |
ddrescue /dev/sda /backup/sda.img logfile | Recovers failing disk to an image file. |
ddrescue -f /backup/sda.img /dev/sdb logfile | Restores image to a new disk (if image is healthy). |
ddrescue -d -r3 /dev/sda /dev/sdb logfile | Uses direct I/O (-d) and retries bad sectors up to 3 times (-r3). |
ddrescue -R -f /dev/sda /dev/sdb logfile | Reverse direction (-R): reads from end to start. |
ddrescue --fill-mode=- /dev/sda /dev/sdb logfile | Fills unresolved sectors with zeros or pattern. |
Common Options (Flags)
| Option | Description |
|---|
-f | Force overwrite output device (required for writing to disk). |
-d | Use direct I/O (bypass kernel cache) – recommended for failing drives. |
-r N | Retry bad sectors N times after the first pass (e.g., -r3). |
-R | Reverse read direction (from end to start). |
-i N | Start at sector N (skip initial sectors). |
-s N | Copy only N sectors (limit size). |
-o N | Offset output start by N sectors. |
-B | Use binary prefix for sizes (e.g., 1M = 1,048,576 bytes). |
-v | Verbose output (shows progress and errors). |
-P N | Update progress every N seconds. |
How to Use ddrescue
Basic Recovery Workflow
- Identify the failing drive: Use
lsblk (Linux) or diskutil list (macOS) to find device names (e.g., /dev/sda). - Prepare a destination: Have a healthy drive or image file of equal or larger size.
- Run first pass (fast):
sudo ddrescue -d -f /dev/sda /dev/sdb logfile (copies good sectors). - Run second pass (retry bad sectors):
sudo ddrescue -d -f -r3 /dev/sda /dev/sdb logfile (retries up to 3 times). - Run third pass (aggressive):
sudo ddrescue -d -f -r1 -R /dev/sda /dev/sdb logfile (reverse direction, one retry). - Check results: View logfile status with
ddrescue --show-status logfile.
Recover to Image File
sudo ddrescue -d /dev/sda /backup/sda.img logfilesudo ddrescue -d -r3 /dev/sda /backup/sda.img logfile
Restore Image to New Drive
sudo ddrescue -f /backup/sda.img /dev/sdb logfile- If the new drive is larger, you can resize partitions after restore.
Reading the Log File
- Log file contents: Stores progress, bad sector list, and recovery status.
- View status:
ddrescue --show-status logfile – shows current position, errors, and recovered bytes. - Resume from log: If interrupted, just run the same command again; ddrescue reads the log and continues.
Important Notes
- Installation:
sudo apt install ddrescue (Debian/Ubuntu) or sudo dnf install ddrescue (Fedora/RHEL). On macOS, install via Homebrew: brew install ddrescue. - Failing drive: Mount the failing drive as read-only if possible, or use
ddrescue directly without mounting to avoid further stress. - Direct I/O (-d): Recommended for failing drives to bypass kernel cache, which can cause timeouts on bad sectors.
- Retry count (-r): Start with -r1 or -r3; too many retries can further damage the drive.
- Reverse (-R): Useful for CD/DVD and some magnetic drives where bad sectors are concentrated at one end.
- Fill-mode: For unresolved sectors, use
--fill-mode=- to write zeros (or a pattern) to the output; this creates a complete image that may still be partially mountable. - SMART status: Check drive health with
smartctl -a /dev/sda before recovery. - Time: Recovery can take hours or days depending on error severity and drive speed.
- Alternate tools: For Windows, use HDDSuperClone or ddrescue via WSL; for macOS, ddrescue works via Homebrew.
Post Views: 584