
Data recovery on vintage hard drives like the Seagate ST8000DM0004 starts with identifying the failure type – electronic, firmware, or mechanical. Each requires a different approach, and misdiagnosis can make things worse. Here’s a quick guide to help you assess your situation and decide on the next step.
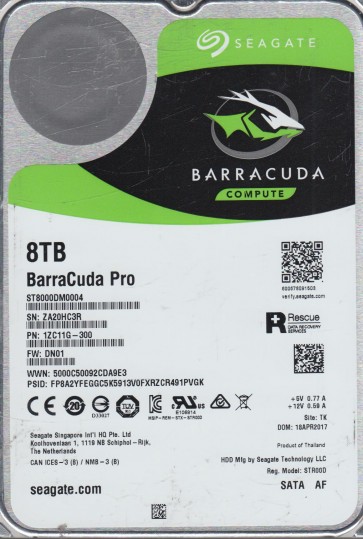
The Seagate ST8000DM0004 is a 8TB 3.5-inch 5400 RPM SATA III hard drive belonging to Seagate’s Barracuda Compute series. It uses Conventional Magnetic Recording (CMR) technology and features a 256MB cache. Common applications include desktop storage, external enclosures, and as a secondary drive for bulk data. Key failure points in this model often involve the SATA connector pins, the main controller chip (a Seagate custom ASIC), and the voice coil motor (VCM) assembly. The drive is recognized for its high data density which makes platter damage more critical during head crashes.
Identifying Common Failure Types
1. Mechanical Failure (Head Crash or Stiction)
Symptoms: Loud clicking (often three or more repeats), grinding noises, or complete silence with no spin-up. The drive may be detected by BIOS as “0GB” or fail to spin at all. This can occur from sudden impact, power surges, or gradual bearing wear. The ST8000DM0004 has a high platter count (up to 6 platters internally), making head instability a common failure after physical shock.
2. Firmware Corruption (P-list or SA Error)
Symptoms: Drive initializes but is extremely slow, shows incorrect capacity (e.g., 4GB instead of 8TB), or hangs during boot. The system may report “SMART status bad” or “I/O device error”. This often results from power loss during firmware updates, bad sectors causing module corruption, or age-related degradation of the System Area (SA) on the platters. Seagate drives are particularly susceptible to SA module issues.
3. Bad Sector Proliferation (Media Decomposition)
Symptoms: File access freezes, chkdsk reports large numbers of bad clusters, or copying files fails with cyclic redundancy check (CRC) errors. The drive may remap sectors but eventually becomes unreliable. This is common in drives that have been running hot (above 45¡ãC) or have suffered from vibration during operation. The high density of the ST8000DM0004 means that a single scratch on the platter can destroy hundreds of thousands of clusters.
4. Electronic Failure (PCB or Preamp Damage)
Symptoms: Drive does not spin, emits no sound, and is not detected in BIOS. The PCB may show burn marks (especially near the TVS diodes or the motor controller). A power surge (e.g., from a faulty PSU or lightning strike) is the most common cause. On this model, the SATA connector pins can also break loose from the PCB due to repeated plugging/unplugging.
Potential Recovery Paths
Professional Data Recovery Services
For any mechanical failure (head crash), firmware corruption requiring hardware tools, or severe bad sector issues, professional service is highly recommended. Expect costs to range from $400 to $1500 depending on the severity. Look for labs that mention “Seagate F3 architecture” support and have a cleanroom (Class 100 or better). Professionals use tools like PC-3000 or DeepSpar DDI to access SA modules and perform head transplants using identical donor drives (e.g., a matching ST8000DM0004 with the same firmware version). DIY is not viable for mechanical failures as opening the drive outside a cleanroom will introduce dust and destroy the platter.
DIY Recovery Paths (Only for Software/Logical Issues)
Case 1: Bad Sectors (Software) Use a Linux live CD (e.g., Ubuntu) and the ddrescue tool. First, image the drive to a healthy target: sudo ddrescue -d -r3 /dev/sdX /mnt/recovery/image.img /mnt/recovery/logfile.log. This tool skips bad sectors and retries later. Do not run chkdsk on the original drive. After imaging, use data carving tools like PhotoRec or R-Studio on the image file to reconstruct files.
Case 2: Firmware Issues (Faint Possibility) If the drive is detected but showing wrong capacity, you may attempt to access it with Seagate’s SeaTools for DOS (free tool). Boot from a USB, run “Fix All” – but note this can erase data if SA is corrupted. Better DIY alternative: Use HDD Regenerator on a spare drive (not recommended for critical data). For serious firmware problems, you need a hardware tool (e.g., a USB-to-TTL adapter and terminal commands) which requires advanced knowledge and brick risk.
Case 3: Electronic Failure (PCB Swap) If the PCB is visibly damaged (burned TVS diodes) but the motor and preamp are intact, you can try replacing the PCB. Order an exact match: same PCB number (e.g., 100801xxx) and firmware version. After swapping, you MUST transplant the original BIOS (or “ROM”) chip from the old PCB to the new one using a hot air station or a soldering iron (fine tip). Without ROM transfer, the drive will not spin or will show wrong capacity. This is a high-risk job requiring microsoldering skills.
What Not to Do
- Do not open the drive chassis. Even a single dust particle can scratch platters at 5400 RPM.
- Do not apply power if you hear clicking or grinding – this can further damage the heads and platters.
- Do not run chkdsk /f or fsck on a failing drive. It forces a full scan and can write to failing areas, making recovery harder.
- Do not shake the drive or try to “reset” it by banging it (this is a myth and will cause head slap).
- Do not freeze the drive. Moisture condensation will destroy the platters.
- Do not attempt a “lazy” PCB swap without transferring the ROM chip. The drive will behave as a new model and may destroy the SA.
- Do not use data recovery software from unreliable sources that claim to fix hardware issues.
Summary
The Seagate ST8000DM0004 is a dense, high-capacity CMR drive that is vulnerable to head crashes, firmware corruption, and bad sector proliferation. For any mechanical issue, professional cleanroom recovery is mandatory. For logical problems (bad sectors, accidental deletion), DIY imaging with ddrescue and carving with PhotoRec is viable. PCB swap is possible but requires exact part matching and ROM transplantation. Never open the drive, never run disk repair tools on the original, and never shake or freeze the device. Always prioritize imaging the drive onto a healthy disk before attempting any data extraction. Backup your important data from this model regularly if it remains in service.