
Data recovery on vintage hard drives like the Samsung SV2002H starts with identifying the failure type – electronic, firmware, or mechanical. Each requires a different approach, and misdiagnosis can make things worse. Here’s a quick guide to help you assess your situation and decide on the next step.
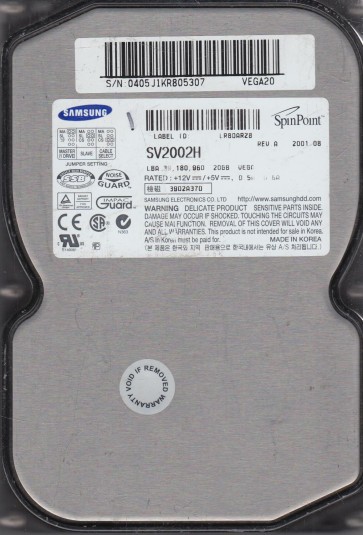
The Samsung SV2002H is a 2.5-inch PATA/IDE hard disk drive from the SpinPoint series, typically with a capacity of 20GB and a rotational speed of 5400 RPM. It utilizes a single platter and was common in older laptops and external enclosures. This generation of drives is known for its relatively robust mechanical design but is still susceptible to age-related issues, including stiction, weak heads, and degradation of the PCB components. The controller is a Cirrus Logic based chipset, which has specific firmware and translator management behaviors. Understanding that this is a PATA drive with a 40-pin connector is critical for recovery, as modern interfaces require specific adapters.
Common Failure Types
1. Mechanical Failure – Head Crash / Stiction
Symptoms: Drive spins up but emits a repetitive clicking, scraping, or chirping sound. The drive is not detected by BIOS, or it is detected as a very small capacity (e.g., 0GB or 1GB). In severe cases, the drive may fail to spin up entirely. Stiction occurs when the read/write heads stick to the platter surface due to dried lubrication or contamination.
Causes: Physical shock, age, head wear, contamination from internal particles, or degradation of the spindle motor bearing.
2. Firmware Corruption – Translator / Service Area Issues
Symptoms: Drive spins up normally, IDs correctly in BIOS, but the system hangs when trying to access it. The drive may show a correct model and capacity but return I/O errors, or it may be detected with a strange model name (e.g., SAMSUNG or SVT2002H). The drive might make normal operating sounds but be completely unresponsive to read commands.
Causes: Sudden power loss during operation, bad sectors causing module corruption, or degradation of the NVRAM storing firmware modules. The SV2002H is known to have a fragile Service Area on a specific band of sectors.
3. Logical Damage – File System Corruption / Bad Sectors
Symptoms: The drive is detected and spins normally. You can see it in Disk Management, but it shows as RAW, unallocated, or prompts to format. Reading files results in CRC errors or data error (cyclic redundancy check). The operating system may become extremely slow or freeze when accessing the drive.
Causes: Improper shutdown, virus attacks, file system inconsistencies (NTFS/FAT32 corruption), or an increasing number of physical bad sectors on the platter surface.
4. PCB / Electronic Failure – Controller or Preamp Damage
Symptoms: The drive is completely dead. No spin-up sound at all, no vibration. The drive may be detected as Unknown Device in Device Manager. A visible burnt smell or damage to a component (e.g., TVS diode, fuse) on the PCB is possible.
Causes: Power surge, faulty power supply, reversed power connector (e.g., from a loose cable), or electrostatic discharge.
5. Degradation of the Spindle Motor
Symptoms: The drive spins up for a few seconds, then spins down and repeatedly attempts to spin up. The sound may be a slow, labored whirring or a grinding noise. The drive may spin, but the heads cannot be loaded because the platters have not reached full speed.
Causes: Age, worn-out motor bearings, or seized motor. This is a less common but known failure mode for older drives that have been heavily used.
Potential Recovery Paths
Professional Data Recovery Services
When to Use: For any mechanical failure (head crash, stiction, motor failure), severe firmware corruption (drive not IDing correctly, clicking), or physical PCB damage (burnt components). Also, if the drive has been heavily tampered with or if the data is critical (business, precious memories).
Process: Professional labs have Class 10 or better cleanrooms. They perform head stack replacements using parts from a donor drive of the exact same model and firmware version. For firmware issues, they use specialized tools (e.g., PC-3000 or DeepSpar) to rebuild the translator or extract data via normal read commands bypassing corrupted modules. For PCB failure, they either repair the board (solder new components) or perform a ROM transplant from a donor PCB.
Cost/Time: Typically $300 to over $2000+ depending on severity. Turnaround time ranges from 3 to 15 business days.
Do-It-Yourself (DIY) Methods – Use with Caution
1. For PCB Failure (Basic): If the drive is dead due to a blown TVS diode or fuse, you can attempt a PCB swap. You must find a donor PCB with the exact same model number and revision. The critical step is to transplant the original drive’s 8-pin or 16-pin serial flash ROM (the firmware chip) from the original board to the donor board. Without this, the drive will not be recognized. This requires precise soldering or a hot air station.
2. For Logical Damage / Bad Sectors (Software): Use disk imaging tools like ddrescue (Linux) or HDDSuperClone (Windows Bootable). Direct the tool to create a sector-by-sector image to a healthy target drive. Set the tool to skip delays, retry only crucial sectors, and log the bad areas. After imaging, use file system repair tools (like TestDisk or R-Studio) on the image file, never on the original drive. WARNING: Do NOT run chkdsk /f or format the drive. These operations can write to the drive and destroy data permanently.
3. For Firmware Issues (Advanced): If the drive IDs but hangs, you can try using a terminal (via a TTL adapter) to communicate with the drive’s UART port. You may see a terminal prompt. Sending F1 or specific commands to disable the firmware from loading or to reset the translator can sometimes make the drive accessible for imaging. This requires knowledge of the Cirrus Logic command set and is extremely risky for a beginner. One wrong command can render the drive permanently inaccessible.
What Not to Do
1. Do Not Open the Drive Enclosure. The internal platters are extremely sensitive to dust and fingerprints. Opening the drive in a normal room will almost certainly lead to a head crash and permanent data loss. Professional cleanroom environments are required.
2. Do Not Run chkdsk, ScanDisk, or Format the Drive. These tools attempt to repair the file system by writing to the drive. If the drive has physical damage, this will overwrite and destroy the data in bad areas and can cause the heads to skip over the damaged platter, creating more scratches. If the data is critical, never use any repair software.
3. Do Not Power Cycle the Drive Repeatedly. If the drive is clicking, each power cycle can cause the head to scrape against the platter surface. This can quickly turn a recoverable head problem into a catastrophic platter scratch. If you hear clicking, turn the drive off immediately.
4. Do Not Freeze the Drive. Putting a hard drive in the freezer is a dangerous myth. The condensation created when the drive thaws can cause short circuits on the PCB and corrosion on the platters. It is extremely unlikely to help, especially with a PATA drive like the SV2002H.
5. Do Not Use Random PCB Swaps. You cannot just swap any PCB of the same model. The firmware on the original board is unique to that drive’s specific platter geometry. Using a mismatched board can cause firmware corruption, making the drive unresponsive even to professional tools. Always transplant the ROM chip.
Summary
Recovering data from a Samsung SV2002H drive requires a precise diagnosis of the failure type. Mechanical failure (clicking, scraping) demands immediate professional cleanroom intervention. PCB failure (dead drive) can sometimes be addressed with a careful ROM transplant. Logical damage (RAW, bad sectors) is the most DIY-friendly, with tools like ddrescue offering a path to image the drive without altering it. Critical warnings: never open the drive, never run chkdsk, never freeze it, and never power cycle a clicking drive. Prioritize a professional evaluation for any mechanical or complex firmware issue as the cost of a DIY mistake is often permanent data loss. The best recovery path is always a clean, controlled imaging of the entire disk to a stable new drive.