
Data recovery on vintage hard drives like the Western Digital WD10EARS starts with identifying the failure type – electronic, firmware, or mechanical. Each requires a different approach, and misdiagnosis can make things worse. Here’s a quick guide to help you assess your situation and decide on the next step.
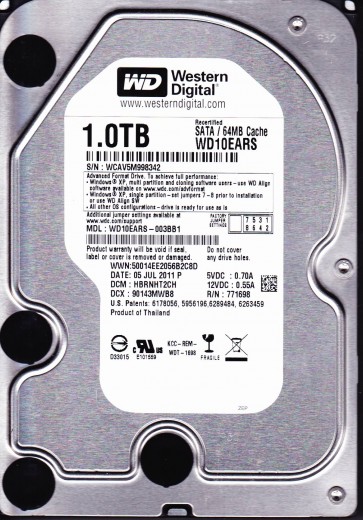
The Western Digital WD10EARS is a 1TB, 3.5-inch desktop hard drive from the “EARS” series, notable for its Advanced Format (AF) technology using 4KB physical sectors. This drive was designed for high capacity and low power consumption, but its unique sector layout and 4096-byte physical sector size make it particularly sensitive to misaligned partitions and firmware issues. It is a legacy drive commonly found in external enclosures and older desktop PCs, operating at a rotational speed of 5400-7200 RPM and utilizing a SATA 3Gb/s interface. Understanding its AF nature is critical for recovery as it often presents as a logical failure when the issue is firmware misconfiguration.
Common Failure Types
1. Logical Corruption & Partition Misalignment
Symptoms: Drive is detected in BIOS but shows as unallocated or raw in Windows. Data appears missing or is inaccessible. The system may prompt to format the drive. This is extremely common if the drive was not partitioned using Windows Vista/7 or later, or if it was used in an older OS without proper alignment tools.
Cause: The 4KB physical sector size (Advanced Format) was not properly aligned with the logical 512-byte emulation. This caused read/write amplification and eventual corruption of the file system structures like the Master File Table (MFT) on NTFS partitions.
2. Firmware Corruption & Drive Lock
Symptoms: Drive spins up, may be detected with an incorrect model number (e.g., “WD10EARS-00Y5B1” changing to a generic string), or reports a capacity of 0 GB or 1.0 GB. The drive may click once and then go idle, or show as “Not Initialized” in Disk Management. It often fails to communicate properly after a power loss or bad sector development.
Cause: The WD10EARS series has a known vulnerability where firmware modules become corrupt, often due to weak heads reading the system area (SA) or from sudden power loss during a recalibration. This leads to the drive locking its own access to the platters.
3. Mechanical Failure – Head Crash & Stiction
Symptoms: Loud clicking or scratching noises from the drive. Drive fails to spin up, or spins up and then rapidly stops. The BIOS may hang on detection or take an exceptionally long time. SMART data may show Reallocated Sectors at critical values or Raw Read Error Rates approaching infinity.
Cause: Physical damage to the read/write heads, often from a drop, excessive vibration, or degradation of the head stack assembly (HSA). The 4KB platter density makes the heads more susceptible to debris. Stiction occurs when the heads stick to the platter surface.
4. Bad Sectors & Media Degradation
Symptoms: The drive operates very slowly, files become corrupt or take a long time to open, and chkdsk or error checking reports numerous bad sectors. The system may freeze when reading specific files. SMART attributes such as “Current Pending Sector Count” and “Reallocated Sectors Count” increase steadily.
Cause: Normal wear and tear on the magnetic platters, often accelerated by high operating temperatures or manufacturing defects in this specific series. The 4KB sector size means a single physical defect can corrupt multiple logical sectors.
5. PCB & Electronic Failure
Symptoms: Drive does not spin up, no motor sound. TTL serial console (if available) shows no activity. A burning smell may be present. The drive may show a “short circuit” or “device descriptor request failed” error in Windows Device Manager.
Cause: Power surge, lightning strike, or failure of the TVS diode or controller chip on the printed circuit board (PCB). This is less common than head failures but is often misdiagnosed as a mechanical problem.
Potential Recovery Paths
DIY Methods (For Logical & Soft Issues Only)
1. Partition Alignment & Data Carving: For logical corruption and misalignment, use a Linux live CD (e.g., Ubuntu) with a tool like `testdisk` or `photorec`. These tools bypass the OS’s partition alignment issues. Run: `sudo photorec /dev/sdX` to recover files by signature (carving). This is successful for many raw or unallocated scenarios. Do NOT use `chkdsk /f` on the raw drive.
2. Firmware Recovery (Advanced DIY): Using a terminal program (PuTTY or Tera Term) on a TTL serial adaptor (3.3V) connected to the drive’s console pins, you can attempt to enter the firmware’s safe mode. This requires specific knowledge of the WD Marvell commands (e.g., `^L`, `R0`, `W0`). This is riskier and only advised for users who have practiced on donor drives. A common command is to disable the “slow respond” or “spin-up delay” using the `S` command in terminal mode.
3. Cloning with Read Error Ignorance: If the drive has bad sectors but still spins, use `ddrescue` (on Linux) or `HDDSuperClone` (on Windows/Linux) to create a raw image. The command `sudo ddrescue -d -r3 /dev/sdX /dev/sdY logfile.log` will attempt to clone data, skipping hard errors first and retrying them later. This is critical before any attempt to run recovery software.
4. PCB Swap (Strict Rules): If the PCB is dead but the motor and heads are good, a PCB swap may be possible. The donor PCB must have an identical model number (e.g., 2060-771945-000 REV A). Crucially, you must transplant the original PCB’s ROM chip (8-pin serial flash) onto the donor board, or pre-program the donor with the original firmware. Without this, the drive will not spin up correctly due to unique adaptive data.
Professional Services (For Mechanical, Complex Firmware, or Critical Data)
1. Clean Room Head Exchange: If the drive is clicking or has a head crash, a professional lab (e.g., DriveSavers, Kroll Ontrack, Gillware) must open the drive in a Class 100 clean room. They will replace the read/write heads with a matched donor set from an identical drive. This is the only reliable method for mechanical failure.
2. Advanced Firmware Repair: For firmware corruption that TTL commands cannot fix, professional tools like PC-3000 or DeepSpar Flash Extractor allow a technician to read the ROM and service area directly, rebuild translator modules, or disable bad head maps. This is necessary when the drive is locked or reports 0GB.
3. Platter Transplant: In severe cases where heads damage the platter surface, the only path is to physically remove the platters from the WD10EARS and install them into a donor drive of the exact same model and firmware version. This is extremely delicate, expensive, and only for high-value data.
What Not to Do
1. Never run chkdsk /f or /r on a failing WD10EARS. The Advanced Format sector layout means chkdsk will aggressively remap 4KB sectors, destroying the logical-to-physical mapping. It will likely render the drive unreadable and make professional recovery much harder, often requiring a full clean-room platter transplant.
2. Do not attempt to “make the drive spin” by tapping or freezing it. Hitting the drive or placing it in a freezer can cause the head stack assembly to flex, leading to a head crash or stiction. These methods are myths and will destroy any chance of recovery of a mechanically failing WD10EARS.
3. Do not open the drive’s internal chamber at home. The WD10EARS platters are highly sensitive to dust and microscopic particles. Even a single hair or dust particle can land on the surface and cause a head crash when the drive is powered on. Opening the drive voids any warranty and almost always leads to permanent data loss.
4. Do not apply power repeatedly if the drive is making clicking or scraping noises. Each power cycle risks further damage to the platter surface as the heads bounce off the media. This increases the area of damage exponentially, turning a possibly recoverable head failure into an irreversible platter scratch.
5. Do not use random “data recovery software” that writes back to the original drive. Tools like “GetDataBack” or “R-Studio” should only be used on a cloned image, never the source drive. Writing data back (e.g., to fix the MBR) can overwrite critical file system structures, especially on this AF model where the partition’s first sector might be misaligned and overwritten.
Summary
The Western Digital WD10EARS is a challenging drive for recovery due to its Advanced Format 4KB sector design, which predisposes it to logical corruption from misalignment and specific firmware vulnerabilities involving the service area. The most common issues are partition becoming raw, firmware lock, and physical head failure. Safe recovery must begin with accurate triage: if the drive is clicking, stop immediately and seek a professional clean-room service for a head swap. If the drive is detected but shows as unallocated, do not run chkdsk; instead, use `ddrescue` to create a clone, then attempt file carving with `photorec`. For firmware issues, only advanced terminal commands or professional tools like PC-3000 can restore access. Never freeze, tap, or open the drive. The single golden rule for the WD10EARS is: align your partition correctly, clone before scanning, and never write back to the original drive.