
Data recovery on vintage hard drives like the Seagate ST3160811AS starts with identifying the failure type – electronic, firmware, or mechanical. Each requires a different approach, and misdiagnosis can make things worse. Here’s a quick guide to help you assess your situation and decide on the next step.
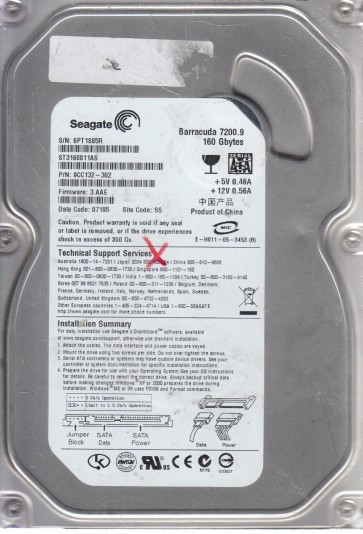
The Seagate ST3160811AS is a 160GB 3.5-inch SATA hard disk drive (HDD) from the Barracuda 7200.10 family. It operates at 7200 RPM and utilizes a perpendicular magnetic recording (PMR) technology. This model is known for using a single 160GB platter and has an 8MB cache buffer. The controller board typically features a Marvell or Agere system-on-chip (SoC) and a Smooth motor controller. As an older generation drive, its firmware is less complex than modern drives, but it still relies on an adaptive zone layout stored in the system area (SA). The SA is located on the platters, separate from user data, and contains critical modules including translator tables, defect lists, and SMART attributes. When the drive is powered on, the read/write heads seek to the SA on the inner diameter to load this firmware before the drive can respond to system commands.
Identifying Common Failure Types
1. Mechanical Failure – Stiction or Spindle Motor Seizure
In the ST3160811AS, head stiction is relatively common where the heads stick to the platter surface after prolonged idle periods. Symptoms include a single thud sound and no further spin-up, or a repetitive ticking sound without reaching full speed. Spindle motor seizure can occur due to degraded bearings, resulting in a high-pitched whine or complete silence with power consumption but no platter rotation. This unit uses a four-pin motor connector, and motor driver chips (e.g., the Smooth L7250 series) can fail, causing the motor to not rotate.
2. Electronic Failure – TVS Diode or Preamp Damage
The ST3160811AS PCB is vulnerable to power surges. The 5V and 12V TVS (Transient Voltage Suppression) diodes are common failure points. If a diode shorts, it can blow the zero-ohm resistors or the internal fuse, resulting in a completely dead drive (no spin, no sound). Conversely, a shorted diode can cause the drive to attempt to spin but fail due to insufficient voltage. The preamplifier (preamp) chip located within the head assembly can also be damaged by electrostatic discharge (ESD) or voltage spikes, leading to the drive clicking (heads trying to move) but not being recognized, as the read/write signals are corrupted.
3. Firmware Corruption – Module or Zone Table Issues
This generation of Seagate drives is known for firmware module failures. The translator (module 11, 12, or 1F) can become corrupted due to bad sectors or power loss during SA writes. Symptoms include the drive being detected with the correct model and size but hanging or freezing the system when trying to access data, or reporting the full capacity but showing as unallocated. Another common issue is a “BSY” (Busy) state where the drive is locked in spin-up but never sends a READY signal to the host. This often stems from a corrupt or missing AM or VEN module. The drive may also click a few times (heads loading) but then fall silent with a busy LED.
4. Logical Failure – File System Damage
Logical failures are non-physical. These include accidental partition deletion, formatting, or file corruption due to bad sectors in the file allocation table (FAT/NTFS). The drive will spin normally, be detected by the BIOS, and may show the correct capacity but report the drive as “RAW” “uninitialized” or with an incorrect file system. The heads and media are physically healthy, but the data structures that the operating system uses to locate files are damaged.
Potential Recovery Paths
Professional Data Recovery Services
For hardware failures (mechanical or electronic with preamp damage), professional intervention is mandatory. A cleanroom (Class 10 or better) is required for any head or platter swap. The technician will typically: (1) Diagnose the specific fault using specialized tools like a PC-3000 or MRT system. (2) For stiction, carefully rotate the motor or platters to break the bond. (3) For motor seizure, perform a restricted donor platter swap matching the firmware version (e.g., 3.AAE or 3.AAF). (4) For preamp damage, carefully transplant the heads from an exact donor match (same DCM code). (5) For electronic failures, replace the shorted TVS diode and fuse, or use a PCB adapter board (via ROM transfer) if the original PCB is unrepairable. (6) For firmware corruption, use a hardware flasher to reprogram the SA modules from a donor or fix the corrupt sectors. Professional costs range from $300 to $3000+ depending on severity. Choose a lab with ISO 5 or better certification and a cleanroom environment.
DIY Recovery: Software-Only Approach
Only attempt DIY if the failure is strictly logical (drive spins normally, no abnormal noises, detected in BIOS). Use a write-blocker to prevent any accidental writes to the source drive. Recommended tools: (1) ddrescue (Linux) or R-Studio for imaging in the background. Run ddrescue to create a raw image first; it will handle bad sectors by skipping and retrying. (2) Once a full image is made, use data recovery software like R-Studio or GetDataBack to scan the image for lost partitions or file signatures. (3) If the drive is detected but shows raw, do not format it. Instead, use a partition recovery tool (e.g., TestDisk) to rebuild the partition table from the backup boot sector. (4) If the drive clicks or makes mechanical noise immediately, do not proceed with software. Power off and seek professional help. DIY software recovery is only safe for logical errors and has a success rate of 80-95% if the drive is fully healthy. Do not use any “free” or “registry fix” tools; they can overwrite data.
DIY Recovery: PCB Swap for Electrical Damage
If the drive is dead due to a power surge (no spin, no sound), and only the TVS diodes are blown (visible as a short on the 5V or 12V line), you can attempt a PCB swap. Procedure: (1) Identify the exact PCB revision (e.g., 100466574 REV B). (2) Source an identical donor PCB (matching part number and firmware version). (3) Crucial step: On Seagate 7200.10 drives, the unique calibration data is stored in an 8-pin serial flash (e.g., 25P05AV) on the PCB. You must desolder the original ROM chip from the faulty PCB and solder it onto the donor PCB. Without ROM transfer, the drive will not calibrate correctly and may not spin or will fail to find tracks. (4) Solder the donor PCB and install it. Apply power. If successful, the drive will spin up normally. This only fixes electronic issues; any mechanical damage (e.g., heads crashing) will not be resolved. If the drive spins but clicks, the real problem is mechanical and the PCB swap was unnecessary.
What Not to Do
- Never open the hard drive enclosure. The platters are sealed in a cleanroom environment. Any particle of dust can cause head crashes. Opening it voids any chance of professional recovery.
- Do not apply power repeatedly. If the drive clicks, buzzes, or makes scraping noises, power it off immediately. Continued operation will damage the platters and heads irreversibly.
- Do not use “free” or “recovery” software on a clicking drive. This will cause further physical damage. Only use software on a healthy, detected drive.
- Do not attempt to freeze the drive. This outdated myth causes condensation, which leads to head stiction and platter corrosion, ending recovery possibilities.
- Do not run CHKDSK or any repair utility. These tools write to the drive’s file system. On a failing drive, they can overwrite critical data or cause the heads to seek over bad areas, causing further damage.
- Do not shake or tap the drive. Mechanical alignment is extremely precise. Physical shock can misalign the heads or create new scratches on the platters.
- Do not attempt a DIY head swap without proper tools and training. Even in a cleanroom, head swaps are extremely complex (0.1mm tolerance) and require specialized tools like a head stack comb and micro-screwdrivers.
- Do not ignore the SMART data. If you can still access the drive, check SMART. Pending sectors (C5) and reallocated sectors (05) are early warnings. Do not try to repair these with low-level formatting.
Summary
The Seagate ST3160811AS is a robust but aging drive prone to specific failure types: electronic (TVS diode shorts), mechanical (head stiction, motor seizure), and firmware (module corruption). Success in data recovery depends entirely on correctly identifying the failure class. For electrical faults, a PCB swap with ROM transfer is a viable DIY solution. For mechanical or preamp damage, professional cleanroom intervention is mandatory. For logical failures, software imaging with ddrescue is the safest path. The golden rule is: cease all operations if you hear unusual noises or if the drive is not detected properly. Prioritize imaging over direct manipulation. Never format or run repair tools. Always use a write-blocker if the drive is still functional. A logical recovery has a high success rate, while mechanical and firmware failures require expert handling. The cost of a professional service is often justified by the irreplaceable nature of the data. Proper handling and immediate shutdown upon physical symptoms maximize the chance of a full recovery.