
Data recovery on vintage hard drives like the Seagate ST9250315ASG starts with identifying the failure type – electronic, firmware, or mechanical. Each requires a different approach, and misdiagnosis can make things worse. Here’s a quick guide to help you assess your situation and decide on the next step.
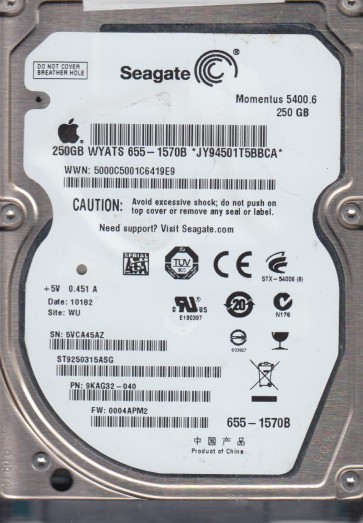
The Seagate ST9250315ASG is a 2.5-inch 250GB SATA hard drive typically found in older laptops and portable external enclosures. It utilizes a 5400 RPM spindle speed and is based on perpendicular magnetic recording technology with a single platter design. Physically, it is a standard 9.5mm height drive with a SATA 3Gb/s interface that is backward compatible with SATA 1.5Gb/s. Internally, it features a Marvell or LSI controller, a fluid dynamic bearing motor, and thin-film magnetoresistive heads. Understanding that this is a mechanical drive with moving parts is crucial for data recovery. Failure can be due to electronics, mechanics, or firmware issues.
Identifying Common Failure Types
1. Electronic Failure (PCB Issues)
This occurs when the circuit board (PCB) fails. Symptoms include the drive being completely dead with no spin, no sounds, or the drive not being detected by the BIOS. The motor may receive power but the spindle will not start. A common cause is a damaged power management IC or a blown TVS diode protecting the 5V or 12V rail. In some cases, the preamp on the PCB or the firmware chip (usually an SPI flash) can fail. You might smell burning components or see visual damage like cracks or charring on the PCB.
2. Mechanical Failure (Head Crash or Stiction)
This is a physical failure of the internal mechanism. A head crash occurs when the read/write heads physically contact the platter surface, scraping the magnetic layer. Symptoms include a repetitive tick or clicking sound (click of death), a scratching or grinding noise, or the drive may spin up and then stop repeatedly. Stiction (head parking failure) can cause the heads to stick to the platter surface, resulting in a brief spin followed by silence. This is often triggered by sudden shock, physical drop, or power loss during operation. If you hear any grinding, do not power the drive again.
3. Firmware Corruption
The drive¡¯s internal firmware (system area) can become damaged. Symptoms include the drive spinning but not being recognized, being detected with the wrong capacity (e.g., 0GB or 16GB), or being detected but unreadable with specific error codes like “SMART status bad” or “I/O device error”. This can be caused by sudden power loss, bad sectors in the service area, or failed firmware updates. The drive motor will usually run normally but it cannot access the user data area due to a corrupted translation layer or module.
4. Bad Sectors and Degradation
This is a software-visible hardware issue. The magnetic media on the platters begins to degrade, causing read/write errors. Symptoms include extremely slow drive operation, repeated system hangs when accessing certain files, or the operating system reporting cyclic redundancy check (CRC) errors. The BIOS usually recognizes the drive correctly but the OS may take a long time to mount it. This often progresses over time and can be a precursor to a full head crash.
Potential Recovery Paths
Professional Data Recovery
This is the safest and most effective option for the ST9250315ASG, especially with mechanical or firmware failures. A professional lab (e.g., DriveSavers, Ontrack, or a local cleanroom lab) will perform a full diagnosis in a cleanroom environment (Class 100 or better). For head crashes, they will replace the head stack assembly (HSA) with a matching donor unit from a same-model drive, adjust firmware parameters for the new heads, and extract data using specialized imaging tools like PC-3000 or DeepSpar. For PCB failure, they can repair or replace the board and copy the original firmware to the new board using a programmer. For firmware corruption, they can use tools to read the platter system area and rebuild the translation table. Expect costs between $300 and $1500 depending on the failure severity. Turnaround time is usually 3-15 business days.
DIY Recovery (Only for Specific Cases)
DIY is only viable for simple electronic failures or minor logical bad sectors. Here are specific steps for limited scenarios:
- PCB Replacement (TVS diode failure): If you visually confirm a blown TVS diode on the 5V rail, you can order a donor PCB with the exact same part number (ST9250315ASG) from a supplier like HDDZone or DonorDrives. You must transfer your original drive’s firmware BIOS chip (usually an 8-pin serial flash chip near the SATA connector) to the donor board using a hot-air station or a fine-tipped soldering iron. Without this chip transfer, the drive will not spin or will have wrong capacity. This is a micro-soldering task requiring steady hands and a magnifier.
- Bad Sector Imaging: If the drive is detected but slow with bad sectors, you can use software like ddrescue (Linux) or HDD Raw Copy Tool (Windows) to create a sector-by-sector image. Run ddrescue with the -r (retry) and -d (direct) flags, and let it run for days or weeks. Never stop a scan abruptly. Use a separate healthy destination drive. Do not attempt to chkdsk, format, or defrag the failing drive.
What Not to Do
- Do not open the drive enclosure outside a cleanroom. This is a critical mistake. The interior contains magnetic platters that are extremely sensitive to dust and particles. Even a single speck of dust can cause a head crash if the drive is powered on. Opening the seal voids any warranty and destroys the clean internal environment.
- Do not apply power if you hear grinding or clicking. Continuing to power a drive with a head crash will grind the heads further into the platter, physically destroying the data layer and making recovery impossible.
- Do not use software “repair” tools like chkdsk, fsck, or any utility that attempts to fix the filesystem. These tools write to the drive, potentially corrupting the directory structure or overwriting the sectors near failed areas.
- Do not freeze the drive. This is an old myth that can cause condensation inside the drive, leading to corrosion or further sticking of the heads. It does not help in modern drives.
- Do not attempt to swap the PCB without transferring the firmware chip. A donor board must have the same firmware version, and without the original chip, the drive may not initialize or may be locked.
- Do not use the drive as a secondary drive and boot from it. Avoid any read/write activity beyond a controlled imaging attempt.
Summary
The Seagate ST9250315ASG is a traditional mechanical laptop hard drive. Its failure modes are electronic, mechanical, firmware, or media degradation. For any sign of mechanical failure (clicking, grinding) or firmware issues (drive not recognized but spinning), immediate professional recovery is mandatory. DIY attempts are limited to simple PCB swaps only when the original firmware chip is transferred, or logical imaging for bad sectors. Avoid all destructive actions like opening the drive, running chkdsk, or freezing it. Always prioritize data safety over cost savings. If the data is critical, stop using the drive immediately and consult a professional data recovery service.