
Data recovery on vintage hard drives like the Western Digital WD10JCCW starts with identifying the failure type – electronic, firmware, or mechanical. Each requires a different approach, and misdiagnosis can make things worse. Here’s a quick guide to help you assess your situation and decide on the next step.
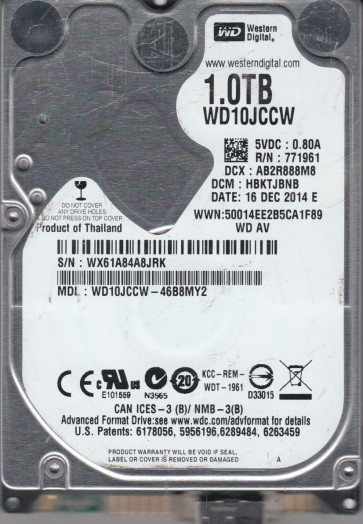
The Western Digital WD10JCCW is a 2.5-inch, 1TB, 5400 RPM SATA hard drive commonly used in external USB 3.0 storage enclosures, particularly the WD Passport series. It features a USB bridge integrated onto the drive’s PCB (Printed Circuit Board), making it a “slim” drive with a proprietary interface. It utilizes Advanced Format (4K sectors) and typically employs SMR (Shingled Magnetic Recording) technology to achieve high density. Key characteristics include a power-efficient design for portable use and an integrated USB-to-SATA bridge chip, which is a frequent point of failure.
Common Failure Types
1. USB Bridge / PCB Failure
Symptoms: Drive is not detected by any USB port, no spinning sound, or the computer sees a “USB Device Not Recognized” error but the drive does not enumerate with a correct model number. There may be no activity at all. Causes: The integrated USB bridge controller chip (often a JMicron or ASMedia) on the PCB is highly susceptible to electrostatic discharge (ESD), power surges from USB ports, or physical damage to the USB connector. This is the most common failure for this specific model.
2. Read/Write Head Failure (Mechanical)
Symptoms: A clicking, ticking, or scratching sound emanating from the drive. The drive may spin up but fail to be recognized, or it may be detected but perform extremely slowly with many bad sectors. In severe cases, the drive may spin up and then click repeatedly. Causes: Physical impact or drop damage. Head failure is often the result of the read/write head physically contacting the platter surface (head crash) or becoming stuck. This is a catastrophic mechanical failure.
3. Firmware Corruption (Logical/Firmware)
Symptoms: Drive spins up, is detected by the BIOS, but is reported with the wrong capacity (e.g., 0MB, 128GB, or garbled characters). The computer may hang when trying to access the drive. The drive may be locked with a hidden password, or the S.M.A.R.T. (Self-Monitoring, Analysis, and Reporting Technology) data shows all values as “Freaking Out” or with high counts of “Current Pending Sectors.” Causes: This often results from a bad sector on the system area (service area) of the platters, a weak preamp failure, or a head failure that corrupts firmware modules. It can also be triggered by sudden power loss during a firmware update.
4. Bad Sectors / Logical Damage (File System)
Symptoms: The drive is detected, spins normally, but file access becomes extremely slow. Files are corrupted, directories disappear, or an “I/O Device Error” appears when trying to copy data. CHKDSK or Disk Utility may hang or report “Unreadable Sector” errors. Causes: This can be a result of physical damage (platter scratches, head degradation) or logical corruption (file system errors due to unsafe ejection, power loss during a write operation, or virus infection).
5. Stiction / Spindle Motor Failure (Mechanical)
Symptoms: The drive does not spin up at all. You may hear a very faint hum or a single “thump” but no rotation. No sounds of platters spinning. The drive feels completely dead. Causes: Stiction (the read/write head or slider parked off the platter becomes stuck to the platter surface) or a seized spindle motor bearing. This is often caused by a drastic impact or a manufacturing defect in the motor. This model’s slim design makes it particularly sensitive to stiction.
Potential Recovery Paths
Professional Services (Recommended for Mechanical or Firmware Failures)
Step 1: Assessment. Send the drive to a certified data recovery lab (e.g., DriveSavers, Gillware, Kroll Ontrack, or a local class 100 cleanroom facility).
Step 2: Cleanroom Access. For head failures or stiction, the platters must be moved to a donor drive of the exact same model and firmware revision in a dust-free environment.
Step 3: Firmware Repair. For firmware issues, specialists use specialized tools (e.g., PC-3000, DeepSpar, SalvationDATA) to read the service area directly, bypassing the damaged modules, or to rewrite the firmware using a pre-programmed ROM. This is extremely risky for DIY due to the drive’s integrated USB bridge.
Step 4: Imaging. The recovered data is imaged at a low level. For SMR drives, this process is slow and complex, requiring special handling to manage the write-caching and zone-based nature of the media.
Step 5: Data Extraction. The final file system is rebuilt and extracted to a new healthy drive. Expect costs ranging from $300 to $2,500+ depending on severity.
DIY Methods (Only for Logical Issues / USB Bridge Replacement)
Option A: USB Bridge Replacement. If the drive is not detected due to a dead USB bridge but the drive itself spins normally, you can attempt to replace the PCB (Printed Circuit Board).
Warning: Never swap a PCB directly from a donor model. Data is encrypted on the PCB. You must transfer the 8-pin serial flash ROM chip from the original PCB to the donor PCB.
Step 1: Identify the exact PCB part number (e.g., 2060-123456).
Step 2: Purchase an identical donor PCB from a seller who guarantees it is a “ROM-swapped” donor or purchase a raw board and carefully desolder the flash chip from the original board and solder it onto the donor board.
Step 3: Reinstall the modified donor PCB. The drive should now be detected as a standard SATA drive if connected via the internal USB bridge, or you can use a SATA-to-USB adapter on the PCB’s SATA pins (if exposed). If the drive clicks, stop immediately.
Option B: Software Imaging (for Bad Sectors Only – No Head Damage).
Step 1: Download a disk imaging tool like ddrescue (Linux) or HDD Raw Copy Tool (Windows).
Step 2: Boot from a Linux Live CD (e.g., SystemRescue) if using ddrescue.
Step 3: Create a full sector-by-sector image of the failing drive to a healthy target drive. Use the `ddrescue -f -n -b 4096 /dev/sdx /dev/sdy mapfile.log` command for initial pass. Never run CHKDSK (Check Disk) or fsck on a failing drive before imaging, as it can cause further file system damage.
Step 4: Once imaged, use file recovery software (e.g., R-Studio, PhotoRec, ReclaiMe) on the image file to extract data.
What Not to Do
1. Do not run CHKDSK or fsck on the original drive. This command attempts to repair file system errors but can worsen physical damage by moving the heads over corrupt areas, creating more damage. It is only safe to run on a clone or image.
2. Do not attempt to open the drive enclosure or remove the platters. Hard drives must be opened only in a Class 100 cleanroom. Even a single dust particle can cause a head crash and render data recovery impossible.
3. Do not apply power to a clicking or scratching drive. Continuing to power a drive with a mechanical head failure will cause the heads to grind against the platters, physically destroying the data surface and making professional recovery infeasible.
4. Do not attempt to freeze the drive. This is a destructive and ineffective myth. It does not fix firmware or mechanical issues and can introduce condensation, permanently damaging the platters.
5. Do not attempt to replace the PCB without transferring the original firmware ROM. The USB bridge controller stores unique calibration data and the encryption key on the PCB. Plugging a donor PCB without the original ROM will result in the drive being undetectable, not spinning up, or misidentifying itself. The drive may also destroy the donor PCB if the original has a short.
Summary
The WD10JCCW is a common external drive whose primary weakness is the integrated USB bridge on the PCB. For USB bridge failures, replacing the PCB and transferring the original ROM chip is a viable DIY path if you have moderate soldering skills. For all mechanical failures (clicking, scratching, stiction) or firmware corruption, immediate professional cleanroom recovery is the only safe and effective option. For logical errors (bad sectors, file system damage), a sector-by-sector image using ddrescue is the recommended DIY approach. Never run CHKDSK or open the drive yourself. The most important step is to correctly diagnose the failure type before taking any action.