
Data recovery on vintage hard drives like the Western Digital WD1800JB starts with identifying the failure type – electronic, firmware, or mechanical. Each requires a different approach, and misdiagnosis can make things worse. Here’s a quick guide to help you assess your situation and decide on the next step.
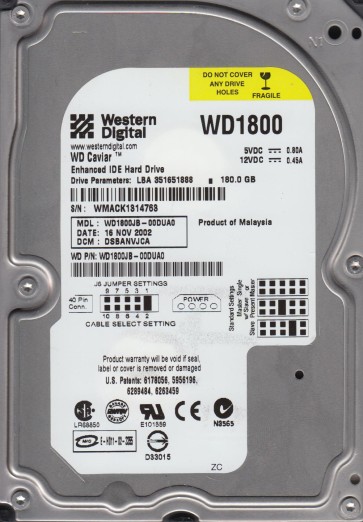
The Western Digital WD1800JB is a classic 180GB IDE/PATA hard drive from the Caviar series, known for its 7200 RPM spindle speed and 8MB cache buffer. It utilizes a single platter design in later revisions and is characterized by its robust mechanical construction and reliance on a Marvell or similar integrated controller. These drives are common in legacy systems, external enclosures, and older media servers. Due to their age, they are susceptible to specific failure modes related to mechanical wear, controller degradation, and logical structure aging.
Common Failure Types
1. Mechanical Head Crash or Stiction
Symptoms: Audible clicking, grinding, or scraping noises; drive fails to spin up or spins up and stops repeatedly (click of death); system does not detect the drive. Stiction occurs when the read/write heads stick to the platter surface after prolonged inactivity.
Causes: Physical shock, particulate contamination, degradation of the head lubricant, or age-related weakening of the voice coil actuator. The WD1800JB’s older ramp-loading mechanism can also cause the heads to land on the platter during power-off, leading to stiction over time.
2. Electronic Controller Board (PCB) Failure
Symptoms: Drive is completely dead (no spin, no noise); a burning smell may be present; external USB adapter recognizes the drive but with incorrect capacity or as an unknown device. The drive may power up momentarily and then shut down.
Causes: Power surges, defective voltage regulator (typically a TVS diode or a 5V/12V regulator chip), failed motor controller chip, or damaged preamplifier circuits. The WD1800JB’s older PCB components are prone to electrolytic capacitor leakage and failure.
3. Firmware Corruption or Translator Module Damage
Symptoms: Drive spins up normally but is not detected in BIOS; detected with zero capacity or incorrect model number; system hangs during detection or reports “SMART status bad”. The drive may click a limited number of times and then go silent.
Causes: Degradation of the SA (System Area) on the platters, bad sectors in the firmware zone, failed ROM (Read-Only Memory) content, or corruption of the translator module. This is a common age-related failure for this generation of WD drives.
4. Logical File System Damage and Bad Sectors
Symptoms: Drive is detected but appears as unformatted or raw; file system error messages (e.g., “The file or directory is corrupted and unreadable”); slow performance, freezing during file access; OS chkdsk fails or reports extensive bad clusters.
Causes: Improper shutdowns, file system structural aging (FAT or NTFS), development of grown defect lists (P-list or G-list saturation), or physical media degradation from years of use. The drive’s native error correction may be overwhelmed.
5. Motor Bearing Failure
Symptoms: Drive emits a loud, high-pitched whine or a scraping sound when spinning; drive takes an unusually long time to spin up; vibration is felt through the chassis. Sometimes the motor will not spin at all.
Causes: Lubricant breakdown over many years, worn ball bearings, or contamination inside the motor assembly. This is a classic mechanical failure for older high-rpm drives.
Potential Recovery Paths
Professional Data Recovery Services
Indicated for: Mechanical failures (head crash, stiction, motor bearing), complex firmware damage, severe PCB failure requiring chip-level repair, or any case where data is critical and must not be risked.
Process: Diagnostics in a cleanroom (Class 10 or better). For head crashes: head stack replacement with a donor drive of the exact same model and firmware version. For stiction: careful prying or voice coil motor manipulation. For PCB failure: board swap with ROM transfer or direct component-level repair. For firmware: specialized tools like PC-3000 or MRT to regenerate modules.
Cost: Typically $500 to $3000+ depending on severity.
Warning: Do not open the drive platter chamber yourself. Dust will destroy the platters and render recovery impossible.
DIY Methods (Use at Your Own Risk)
For Electronically Dead PCB (with no mechanical damage): Locate the TVS diode (usually near the power connector). If shorted, remove it using a fine soldering iron. Alternatively, find a donor PCB from an identical model (same board number, e.g., 2060-xxxx). Transfer the original 8-pin or 16-pin ROM/BIOS chip from the dead board to the donor board using a hot air station. Simple board swapping without ROM transfer usually fails due to adaptive parameters.
For Logical Damage / Bad Sectors: Use a Linux system (e.g., Ubuntu) with a known-good SATA/IDE to USB adapter. First, create a full sector-by-sector image using DDRescue: `sudo ddrescue -d -f /dev/sdX /media/ext/drive_image.img /media/ext/rescue.log`. Do not run chkdsk or fsck on a failing drive. The imaging process pauses on bad sectors, which is safe, whereas chkdsk can cause more damage. Once the image is made, attempt file recovery from the image using tools like R-Studio or PhotoRec.
For Firmware Issues (advanced DIY): Requires specialized tools like PC-3000 or a WD-Marvel utility. This is not recommended for beginners as incorrect operations can permanently brick the drive. Attempting to rewrite firmware with mismatched modules will cause total data loss.
What Not to Do
1. Do not power on a clicking or grinding drive repeatedly. Each second of operation can destroy the platter surface further. Stop immediately.
2. Do not attempt to open the hard drive enclosure. The platters are extremely sensitive to even microscopic dust and fingerprints. Opening it voids any chance of professional recovery and destroys data.
3. Do not run CHKDSK or FSCK on a drive with physical failure or bad sectors. These utilities will mark blocks as “bad” and move data, potentially overwriting your precious files.
4. Do not freeze the drive. This is an obsolete and dangerous myth. Freezing can cause condensation inside the sealed unit, permanently corroding the platters and heads.
5. Do not use data recovery software directly on a failing drive for a prolonged time. Always image the drive first. Extensive scanning on a deteriorating drive can accelerate failure and cause irreversible data loss.
Summary
The Western Digital WD1800JB is a durable vintage drive but highly susceptible to age-related mechanical failures (head crash, stuck motor, stiction), controller board electronics degradation, and firmware corruption. For mechanical or complex firmware issues, professional cleanroom recovery is the only safe option. DIY recovery is possible only for simple PCB failures (TVS diode or ROM transplant) and logical damage, provided that full disk imaging is performed first before any repair attempts. Never force a drive to spin, open it, or run repair utilities on a failing disk. Prompt action based on correct diagnosis is critical to data survival.