How To Perform Diagnostics on Maxtor (or Quantum) SCSI Drives

SCSIMax SCSIMax is a diagnostic utility for all Maxtor (and Quantum®) SCSI hard disk drives supporting Self-Monitoring, Analysis, and Reporting Technology (S.M.A.R.T). This test will determine hard drive integrity in a short period of time, with a high degree of confidence. If the program completes without error, the problem remains elsewhere in your system. Check SCSI cables, termination and operating system. Maxtor recommends you use this utility for troubleshooting potential hard drive problems. These problems include, but are not limited to: potential hard drive surface media problems (e.g., bad clusters or sectors, partitioning/formatting problems, etc.) and drive recognition problems (e.g. hard drive that is not recognized by the operating system). SCSIMax uses the SCSI controller’s ASPI driver to route Int13 commands to the hard drive. The utility is not data destructive, but Maxtor recommends that you complete a full backup of your hard drive before running this utility.

Note: Incompatible with Apple® systems, and SCSI Ultra320 controllers. This utility does not run from the Windows desktop.

Use SCSIMax on all legacy (ie, up to Ultra160/Ultra3 speed) Maxtor SCSI hard drives prior to warranty replacement.

Seatools Enterprise may be used for these drives as well, but is particularly well-suited for Serial-Attached SCSI and SCSI Ultra320 drives of the newest generations.

SCSIMax supports all Maxtor and Quantum SCSI drives including:

  • Atlas 15K
  • Atlas 10K, Atlas II, Atlas III and Atlas IV
  • Atlas 7200RPM IV and Atlas 7200RPM V
  • Viking II

Depending on S.M.A.R.T. settings, not all tests are performed on all drives.

ASPI Drivers

ASPI (Advanced SCSI Programming Interface) is a software layer that enables programs to communicate with SCSI devices. Adaptec® ASPI drivers will load from the Windows 98SE, or Millennium (ME) startup disks, when the “Start computer with CD-ROM support” option is chosen at the selector prompt. LSI host adapters load their own ASPI drivers during system startup. If you are using another brand of SCSI host adapter, consult your host or system manufacturer for ASPI driver support. SCSIMax is not currently supported to run on SCSI Ultra320 controllers, due to boot issues.

SCSIMax System Requirements

  • Windows 98SE/Millennium startup disk, or equivalent bootable DOS disk that loads compatible ASPI drivers, in accordance to the model of SCSI host, being used to test the hard disk.
  • SCSIMAX.EXE program copied to a clean formatted floppy diskette.
  • PC-compatible system (Pentium or newer).
  • A supported Maxtor/Quantum SCSI S.M.A.R.T. capable hard drive.

Step-by-Step Instructions

    1. Download SCSIMax to an existing directory on your hard drive (for convenience copy to the desktop). The download version is a self-extracting Zip file. After opening you will be prompted to insert a floppy into the (A:\) drive.
    2. After SCSIMax has been extracted to the floppy diskette, remove the diskette and perform a normal shutdown.
    3. Boot your system to the 98SE or Millennium startup disk, and at the selector prompt choose the Start computer with CD-ROM support option. This will automatically load the ASPI manager drivers for Adaptec branded hosts.
    4. When the 98/Me boot disk reaches the A:\ prompt, remove the disk, and insert the disk with the SCSIMax utility. Type SCSIMAX at the A:\ prompt and hit [ENTER].
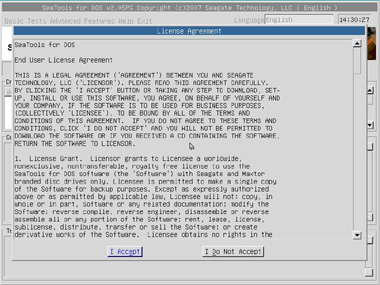
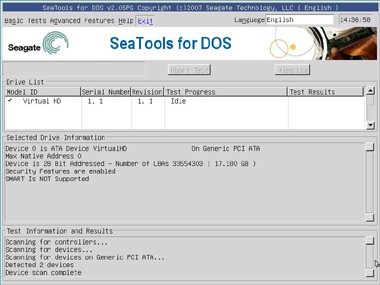
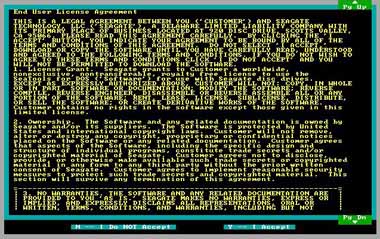
      Note: SCSIMax is designed to run on Maxtor/Quantum S.M.A.R.T. capable hard drives (the utility will identify a drive as S.M.A.R.T. capable). As with any system test or diagnostic, Seagate recommends that you have a complete backup of your drive before beginning.
    5. SCSIMax will next display a license agreement. Choose [Continue] or[Accept]. The program will identify all SCSI controllers in the computer. If your system has more than one drive, you will see a menu of recognized SCSI controllers with attached drives. Select a drive to test, enter its number or choose 0 for all.
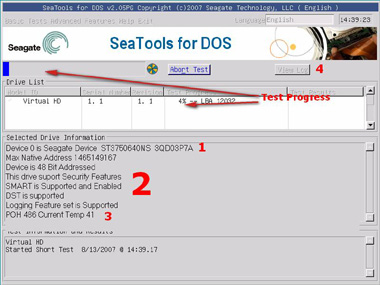
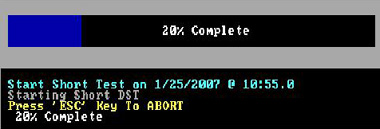
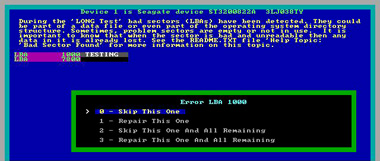
    6. After the Quick Test, you will be prompted to perform a full surface scan. The full surface scan can take quite some time depending upon the drive’s capacity, but will test every Logical Block Address (user’s data area). Seagate recommends the full surface scan if you suspect that the hard disk may report media errors on areas of the drive that are not normally tested by the Quick Test.
    7. When the test finishes you are prompted to Print, Save and Exit. Press S; to save. Regardless of Pass or Fail, SCSIMax saves a drive information text file to the floppy called TESTLOG.prn. If the drive fails any of the tests performed, SCSIMax will display a 6-digit error code. Please make note of the code, or save the TESTLOG.

Note: Owners of O.E.M systems (HP, Compaq, Dell, etc.) that were originally purchased containing a Maxtor or Quantum SCSI drive must contact the O.E.M. or the place of purchase for warranty service.

File Version: 1.21
File Size: 70.0 kb
Supported Operating Systems: Windows NT, Windows XP Home Edition, Windows 2000, Windows Me, Windows 98, Windows 95A, Windows 95B, DOS, Windows XP Professional
Download: SCSIMax

Read More

Seatools For DOS Tutorial

Seatools For Dos SeaTools for DOS is a comprehensive, easy-to-use diagnostic tool that helps you quickly determine what is preventing you from accessing data on your desktop or notebook computer. It includes several tests that will examine the physical media on your Seagate or Maxtor disc drive and any non-Seagate disc drive. This is the walk-through for both the old (text) and new (GUI) version.

In order to use SeaTools for DOS choose to download the floppy diskette version or the bootable CD image version.

Creating a Diskette

For the floppy diskette version you will need one 1.44MB floppy diskette. Click the .EXE file downloaded from the Seagate web site and follow the on-screen instructions.

Creating a CD using the bootable CD image .ISO file.

Just copying the files to a CD will not work; the file must be burned as an image to the CD.

Once the bootable media has been created then boot the computer with the media in the drive. If it doesn’t boot from the media the boot order may need to be adjusted in the computer BIOS.

This document will cover a Graphical and a text version of Seatools for DOS. Find the guide to the graphical version immediately below.

SeaTools for Dos will not detect external drives. Please use SeaTools for Windows to test external drives.

SeaTools for DOS, Graphical version

At bootup, you will see an End User License Agreement:

Image

Simply click “I Accept” to continue.
This will take you to the main menu page.

Image

Under the Basic menu:

  • Short test – Runs a DST test against Seagate drives. If DST is not supported by the drive, Seatools runs a read test. This test takes about 2 minutes.
  • Long test – Runs a full scan of the drive. This is usually used to find and repair bad sectors.
  • Acoustic test – Spins the drive down so you can determine if noise in a system is caused by the drive or by something else.

Image

Advanced Features

  • Set Capacity to 32GB – Limits drive to 32GB for use on Pentium 3 or older systems.
  • Set Capacity manually – Limits drive to a specific number of Logical Block Addresses (LBAs), useful when replacing an unusual drive size in a RAID.
  • Set Capacity to MAX – Used to resize drive to full capacity (does not bypass the limit capacity jumper).
  • Erase Track Zero – Quick Zero fill to erase the data and partitions from a drive. This option requires one second to complete.
  • Timed Erase (10 second, 20 seconds, 1 minute, 5 minutes) – Handy for when quick zero fill just doesn’t get it all (ie, in case of boot loaders, etc).
  • Full Erase – Fills the entire drive with zeros. It can be used to recover bad sectors and erases all data.  This is not a Secure erase .

Below is the Results and Progress screen:

Image

  1. Model number and Serial number for drive selected.
  2. Drive status and supported features displayed.
  3. POH – Power on hours displayed; and Drive temperature in Celsius.

-Click View log to open the log file once the test is complete (won’t show much more than what is on the screen).

SeaTools for DOS, Text Version

Once you have booted into SeaTools a license agreement will appear.

Image

Read the agreement and press “Y” to accept the terms and continue to the testing or press ‘”N” to exit the program. Use the Page Up and Page Down keys to scroll.

Once you agree to the license terms the testing screen will appear.

Image

See here the varying elements of the old version’s testing screen.

  • D or 0-9 – Switches drives – Select which drive to perform actions on (see device area for correlating number).
  • S – Short test – Runs a Drive Self-Test (DST) test against Seagate drives. (If DST is not supported, Seatools runs a read test). Takes about 2 minutes.
  • L – Long test – Full scan of the drive. Usually used to find and repair bad sectors.
  • Z – Zero Fill – Wipes out the data on the drive. Good for erasing corrupted or unusual partitions. It will erase ALL partitions and data on the drive. Quick and Long options supported.
  • A – Spin down drive (for Acoustic test) – Spins the drive down so you can determine if noise in a system is caused by the drive or by something else.
  • C – Set Capacity – Used to set drive capacity to surpass the common 32GB and 137 GB limits. Also used for drives that get clipped to a lower capacity.
  • V – View log file – Pulls up the log file for review.

Image

The explanation for the multi-colored text near the bottom follows:
White text: The device (ie, Device 0) and its model and serial numbers.
Yellow text: The motherboard chipset.
Aqua text: Whether the motherboard supports 48-bit Logical Block Addressing, and the Maximum LBA for this drive along with its capacity.
Green text: SMART status. If SMART has been tripped, then there is no need to run a test. The drive should be replaced.
Green text: DST (Drive Self Test) support status – If DST is supported it will be used during testing.
Blue text: Operating temperature status – Current and Max registered temp – useful in determining if heat is a factor in drive trouble or drive failure. See Product manual for specified Operating temperature. The Worst Temp refers to the highest temp that the drive has ever experienced in its lifetime.
A common unusual reading displays 253 Celsius, which simply means that the drive does not support the temperature reading feature. It is nothing to worry about.
POH = Power on Hours – Tells how long the drive has been running in its total lifetime.

Acoustic Test

Image

Once activated, the drive will spin down so you can tell if noise is coming from the drive or other components (like a computer fan). The drive will remain spun down until user presses a key.
The Pop-up window will remain open for several seconds until the drive spins back up.

Set Capacity

  • S  – Set 32 GB Capacity: Useful for ATA drives on older motherboards that will lock up if the drive is larger than 32 GB. This solution sets the drive to 32 GB.  If too much capacity is lost, you can consider an add-in ATA controller that can fully support >32 GB.
  • R – Reset to Drive Maximum: Useful for both ATA and SATA drives that have been clipped (either manually or spontaneously) back to its maximum capacity.
  • M – Set Manually: Often useful for ATA and SATA drives as an alternative to attempt if the Reset to Maximum fails. Sometimes used to make all drives in a RAID array have the exact same size (use a specific number of sectors on the drive to set the size).
  • Q – Back to Main Menu.

Zero Fill
Main menu options: Z-Erase Drive is the zero-fill option.

Image

Here is the Zero-fill submenu.

Image

On the Zero Fill sub menu you have the following options:

  • Z – Quick Zero Fill (first 63 sectors of the drive, instantaneous)
  • A – Full Zero Fill (every sector of the drive, may take many hours)
  • F – Timed Zero fill where T adjusts the time.

Drive Information
This is the yellow text seen on the bottom of the main menu screen.

Image

Shows hard drives detected

  • Device number – Used to select which drive to test.
  • Model number
  • SN – Serial Number
  • FW – Firmware revision – Useful on SCSI and SATA products and a few ATA products.
  • Controller – Chipset to which the drive is connected. Useful for some SATA and capacity issues. If it is an old chipset, the 28-bit LBA limit may apply, and so the chipset may only support SATA speeds of 1.5Gb/s.

If a drive does not show up in this area then power off the computer and confirm the drive is installed correctly.
View the installation assistance page for details on configuring various types of drives.

Log File
Log file is stored on boot media if writeable or in memory for the CD version. It is stored as: Serial#.LOG
Ex: 5NF0R4RC.LOG
To view log in software, press V.
To exit log viewer, press the Escape key.

Test Status (during a DST)

Image

During a test the top part of the display shows a progress bar and the middle area shows the results.
After the test is complete, the middle area continues to show the result, and the top goes back to showing command options.

Bad Sector Repair (Long Test)

If bad blocks are found during a long test, a prompt will ask how to proceed.
The screen below appears at the end of the scan or if the user aborts the test if bad sectors have been discovered on the drive.

Example:

Image

Follow the instructions on the screen to proceed.
For further information about SeaTools for DOS view the SeaTools for DOS User Guide.txt file.

Read More