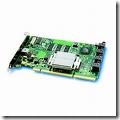
How to sepup a RAID 0/1 Array with WD SATA RAID Controller?

sepup a RAID 0/1 Array with WD SATA RAID ControllerSteps to setup A RAID 0 and RAID 1 Array with WD SATA RAID Controller & Two SATA Hard Drives

1. Steps to create a RAID 0 Array:

  1. With the computer powered off, follow the instructions for installing the RAID controller correctly and connect both Serial ATA hard drives to the controller.
  2. Boot your computer with the controller and drives already installed.
  3. Watch your boot screens for a prompt that will ask you to press the Control and F keys at the same time to enter the Fastbuild utility and press those keys to enter.
  4. Press the 1 key to enter Auto Setup.
  5. Verify that the top of the screen says Optimize Array for: Performance.
  6. If the top of the screen says Security instead of performance, highlight the word Security and press the right arrow button to change the word to Performance.
  7. You should see that two hard drives are being used in the array and you will also see the total size of the array in MB.
  8. Press the Control and Y keys at the same time to save the array configuration.
  9. Press the Y key to create and quick initialize the array.
  10. You will be warned that all data on the drives will be erased, press the Y key to proceed.
  11. The array is now created, press any key to reboot.

Note: A RAID 0 array is not fault tolerant. It is recommended that you backup any important data that you decide to store on the array.

2. Steps to create a RAID 1 Array:

  1. With the computer powered off, follow the instructions for installing the RAID controller correctly and connect both Serial ATA hard drives to the controller.
  2. Boot your computer with the controller and drives already installed.
  3. Watch your boot screens for a prompt that will ask you to press the Control and F keys at the same time to enter the Fastbuild utility and press those keys to enter.
  4. Press the 1 key to enter Auto Setup.
  5. Verify that the top of the screen says Optimize Array for: Security.
  6. If the top of the screen says Performance instead of Security, highlight the word Performance and press the right arrow button to change the word to Security.
  7. Press the Control and Y keys at the same time to save the array configuration.
  8. Press the Y key to create and quick initialize the array.
  9. You will be warned that all data on the drives will be erased, press the Y key to proceed.
  10. The array is now created, press any key to reboot.

Note: A RAID 1 array is designed for fault tolerance. You will not notice any performance increase in your computer after creating a RAID 1 array. A RAID 1 array uses the second hard drive to copy the data of the first drive. Should one of the hard drives fail, you will still be able to boot your computer using the second hard drive.

Important: After creating a RAID 1 array, the total capacity of both hard drives will not appear as usable space in Windows. Because the second hard drive is being used to store the exact same data of the first drive, the usable capacity in Windows will be the capacity of only the first hard drive.

* To use the array for extra data storage only:

  • Install the latest service pack for your operating system to enable large drive support and use Disk Management to partition and format the array.

* To use the array as your bootable system drive:

  • Set your BIOS to boot to CD first and boot from your Windows 2000/XP CD to load your operating system onto the array.
  • Windows will treat the array as one large drive and will install on the array just as it would on a single drive.
  • When you are prompted by Windows setup to press the F6 key to install SCSI or RAID drivers, you will need to press F6 and insert the driver disk that came with your RAID controller.
  • Once the drivers for the controller are installed you will be able to finish the installation of Windows 2000/XP onto the array. After the installation of Windows, please install the latest service pack for Windows to enable large drive support and avoid data corruption.

Note: Your system BIOS may require you to change the order of your boot sequence before you can boot your computer from a controller. For more information about adjusting options in your system BIOS, please contact the manufacturer of your computer or motherboard.

Read More

Difference Between WD Desktop Edition and RAID (Enterprise) Edition Hard Drives

Difference Between WD Desktop Edition and RAID (Enterprise) Edition Hard DrivesWestern Digital manufactures desktop edition hard drives and RAID Edition hard drives. Both of them are designed to work specifically as a stand-alone drive, or in a multi-drive RAID environment.

If you install and use a desktop edition hard drive connected to a RAID controller, the hard drive may not work correctly. This is caused by the normal error recovery procedure that a desktop edition hard drive uses.

When an error is found on a desktop edition hard drive, the drive will enter into a deep recovery cycle to attempt to repair the error, recover the data from the problematic area, and then reallocate a dedicated area to replace the problematic area. This process can take up to 2 minutes depending on the severity of the issue. Most RAID controllers allow a very short amount of time for a hard drive to recover from an error. If a hard drive takes too long to complete this process, the hard drive will be dropped from the RAID array. Most RAID controllers allow from 7 to 15 seconds for error recovery before dropping a hard drive from an array. So it is not recommend installing desktop edition hard drives in an enterprise environment (on a RAID controller).

Western Digital RAID edition hard drives have a feature called TLER (Time Limited Error Recovery) which stops the hard drive from entering into a deep recovery cycle. The hard drive will only spend 7 seconds to attempt to recover. This means that the hard drive will not be dropped from a RAID array. While TLER is designed for RAID environments, a drive with TLER enabled will work with no performance decrease when used in non-RAID environments.

Note: There are a few cases where the manufacturer of the RAID controller have designed their drives to work with specific model Desktop drives. If this is the case you would need to contact the manufacturer of that controller for any support on that drive while it is used in a RAID environment.

Read More

Controllers verified to provide visible RAID volumes greater than 4 TB

The list of controllers below has been verified to provide visible RAID volumes greater than 4 TB.

3Ware 9550SXWin 2003
3Ware 9690PLWin 2003
RHEL 5 U 2
Adaptec 1420SAWin 2003
Areca ARC-1220MLWin 2003
RHEL 5 U 1
HighPoint 2220Win 2003
HighPoint 3220Win 2003
Intel ICH8RWin Vista x86
Win Vista x64
Win XP x64
Intel ICH9RWin Vista x86
Win Vista x86
Win XP x64
Silicon Image SIL3124Win 2003
Read More

Tips For Replacing A Hard Drive From A Failed RAID

Tips For Replacing A Hard Drive From A Failed RAIDThere are some items to consider when replacing a hard drive from a failed RAID. If you are building a new RAID, then all hard drives in the array should be the identical model if at all possible. However, if you must replace a failed hard drive, it can sometimes be difficult to find the same model if that model is out of production.

Below are some tips to follow when selecting a replacement:

Keep in mind that the controller may or may not allow different models in a RAID, so check the RAID controller documentation.

Product life: What is the expected life of the remaining drives? If the other drives are approaching the end of their useful life, then it may be time to replace the entire RAID.

Capacity: The replacement drive should be the same or higher capacity than the original drive. Do not just look at the capacity on the box, since a few megabytes could make the difference between whether the drive will work or not.

(You should check the number of LBAs (or sectors) on the hard drive. Some RAID controllers will allow you to substitute larger drives if the exact capacity is not available, while other controllers require an exact match. Check with the controller manufacturer if the documentation doesn’t make it clear!)

Performance: The replacement drive should match the performance of the remaining drives as closely as possible. If your failed drive was 15,000 RPM, avoid replacing it with a 10,000 RPM drive. RAID arrays depend on the timing between drives to write data. Thus, if one drive doesn’t keep up, it may cause the entire array to fail or at least experience irritating problems.

Interface: Make sure the replacement drive uses the same type of interface connection as the failed drive. If the failed drive used a SCSI SCA (80-Pin) interface then don’t try to replace it with a 68-pin SCSI interface. With Seagate products the last two digits of the model number indicate the interface. For example: LW = 68-Pin, LC = 80-Pin.

The 80-pin LC drives are hot-swappable with backplane connections.

Cache Buffer: It is recommended that the cache buffer for each drive be the same value.  Most RAID controllers will consider drives with mismatching cache buffers to be ineligible for addition to a striped or parity array.

Read More

Tips for selecting Hard Drives for use in a SCSI/SATA RAID Configuration

Tips for selecting Hard Drives for use in a SCSI/SATA RAID ConfigurationMost SCSI and SATA RAID controllers will accept different kinds of hard drives. The hard drives should match in capacity points and rotational (RPM) speed. At best, all drives in an array will be identical–at the same firmware revision level.

RAID can be used with any size hard drive. The smallest capacity drive will determine the largest logical volume size for all drives in the array.

Whenever possible, select drives from an approved vendor drive compatibility list. This ensures that the hard drive is tested, and should function reliably with your SCSI or SATA RAID controller. Untested configurations can possibly work as well. But for best results, select only tested and compatible drives for your SCSI or SATA RAID controller. Most SCSI or SATA controller vendors publish a hard drive compatibility matrix on their web site.

Looking for legacy hard drives? CUE Technologies Inc

Pricewatch.com is a service to allow retailers to advertise their prices in real time, for locating and supplying most any type and brand of computer product, including hard-to-find items.

Read More

RAID Controllers

RAID Controllers What is a RAID Controller?

A disk array controller is a device which manages the physical disk drives and presents them to the computer as logical units. It almost always implements hardware RAID, thus it is sometimes referred to as RAID controller. It also often provides additional disk cache.

A disk array controller name is often improperly shortened to a disk controller. The two should not be confused as they provide very different functionality.

RAID Controller History:

While hardware RAID controllers were available for a long time, they always required expensive SCSI hard drives and aimed at the server and high-end computing market. SCSI technology advantages include allowing up to 15 devices on one bus, independent data transfers, hot-swapping, much higher MTBF.

Around 1997, with the introduction of ATAPI-4 (and thus the Ultra-DMA-Mode 0, which enabled fast data transfers with less CPU utilization) the first ATA RAID controllers were introduced as PCI expansion cards. Those RAID systems made their way to the consumer market, where the users wanted the fault-tolerance of RAID without investing in expensive SCSI drives.

ATA drives make it possible to build RAID systems at lower cost than with SCSI, but most ATA RAID controllers lack a dedicated buffer or high-performance XOR hardware for parity calculation. As a result, ATA RAID performs relatively poorly compared to most SCSI RAID controllers. Additionally, data safety suffers if there is no battery backup to finish writes interrupted by a power outage.

How to Choose a RAID Controller?

New RAID levels, technologies and interfaces make choosing a RAID controller more than just a choice between price and performance. These top tips provide valuable insight to help ensure that you get exactly the right controller to suit your specific data protection needs.

1. Choose the correct bus interface for your needs — forward- or backward-compatibility.

PCI-X has the advantage of being backwardly compatible with the older PCI interface. But it is parallel and half-duplex bidirectional, and the bus runs only as fast as the slowest device. PCIe is the new forward-looking standard, and is intended to cope with the performance and scalability demands for at least the next decade. PCIe has the advantages of being serial, full-duplex bidirectional, and devices are able to independently negotiate the bus speed.

2. Find an easy-to-use Management Interface.
3. Which RAID level?
Considering the factors: Cost of disk storage, Data protection or data availability required, Performance requirements

4. RAID level migration
Consider how complex the process is to migrate your data from your current RAID to your new one and consider whether RAID level migration is something you need.

5. How much more data capacity will you need.

6. A limitation of SATA
The SATA infrastructure allows for Port Multipliers, but they have drawbacks – they can’t be daisychained, limiting their flexibility and expandability; they only support one active host connection at a time, significantly degrading effective throughput and allowing for potential
misidentification of drives.

7. Getting locked in to your Operating System
Your choice of RAID controller shouldn’t restrict either your choice of OS, or restrict the speed at which you can obtain an OS upgrade.

8. Reliability of the RAID code

9. Hardware or software RAID?
The difference between hardware and software RAID isn’t just the price.With hardware RAID, the calculations are carried out by the RAID controller, with software RAID they take place on the server’s CPU. So, if the RAID calculations are fairly simple, say RAID 1 or RAID 10, and the server is fairly powerful, using software RAID shouldn’t be much of a problem. But with more
complex RAID level calculations (RAID 5EE or RAID 6 for example), using hardware RAID can be beneficial because the RAID performance is not compromised by the server’s workload, nor are applications on the server compromised by the RAID workload.With hardware RAID, the RAID functionality is also independent of the OS, and the simple HBA drivers required for a hardware RAID controller are usually available as part of the OS distribution. Also, if it has a battery, hardware RAID can run in write-back mode, adding another level of data protection.

10. Ensure the products you purchase have the support you need

Read More

Tips for Replacing a Drive from a Failed RAID

Replace a drive from a Failed Raid There are several items to consider when replacing a drive from a failed RAID. If you are building a new RAID, then all drives in the array should be the identical model if at all possible.

However, if you must replace a failed drive, it can sometimes be difficult to find the same model if that model is out of production. Below are some tips to follow when selecting a replacement.

Note: Keep in mind that the controller may or may not allow different models in a RAID, so check the RAID controller documentation.

1. Product life: What is the expected life of the remaining drives? If the other drives are approaching the end of their useful life, then it may be time to replace the entire RAID.

2. Capacity: The replacement drive should be the same or higher capacity than the original drive. Do not just look at the capacity on the box, since a few megabytes could make the difference between whether the drive will work or not.

You should check the number of LBAs (or sectors) on the drive. Some RAID controllers will allow you to substitute larger drives if the exact capacity is not available, while other controllers require an exact match. Check with the controller manufacturer if the documentation doesn’t make it clear.

3. Performance: The replacement drive should match the performance of the remaining drives as closely as possible. If your failed drive was 15,000 RPM, avoid replacing it with a 10,000 RPM drive. RAID arrays depend on the timing between drives to write data. Thus, if one drive doesn’t keep up, it may cause the entire array to fail or at least experience irritating problems.

4. Interface: Make sure the replacement drive uses the same type of interface connection as the failed drive. If the failed drive used a SCSI SCA (80-Pin) interface then don’t try to replace it with a 68-pin SCSI interface. With Seagate products the last two digits of the model number indicate the interface.
For example:
LW = 68-Pin
LC = 80-Pin
The 80-pin LC drives are hot-swappable with backplane connections.

5. Cache Buffer: It is recommended that the cache buffer for each drive be the same value.  Most RAID controllers will consider drives with mismatching cache buffers to be ineligible for addition to a striped or parity array.

Read More

Case Study: How to create a RAID 0 (stripped) Array

Raid 0 Array (Stripped) Create a RAID 0 (stripped) array using the Western Digital serial ATA RAID controller and two serial ATA drives.

Note: A RAID 0 array is not fault tolerant. It is recommended that you backup any important data that you decide to store on the array.

To create a RAID 0 array please follow the steps below:

  1. With the computer powered off, follow the instructions for installing the RAID controller correctly and connect both Serial ATA hard drives to the controller.
  2. Boot your computer with the controller and drives already installed.
  3. Watch your boot screens for a prompt that will ask you to press the Control and F keys at the same time to enter the Fastbuild utility and press those keys to enter.
  4. Press the 1 key to enter Auto Setup.
  5. Verify that the top of the screen says Optimize Array for: Performance.
  6. If the top of the screen says Security instead of performance, highlight the word Security and press the right arrow button to change the word to Performance.
  7. You should see that two hard drives are being used in the array and you will also see the total size of the array in MB.
  8. Press the Control and Y keys at the same time to save the array configuration.
  9. Press the Y key to create and quick initialize the array.
  10. You will be warned that all data on the drives will be erased, press the Y key to proceed.
  11. The array is now created, press any key to reboot.

To use the array for extra data storage only:

  • Install the latest service pack for your operating system to enable large drive support and use Disk Management to partition and format the array.

To use the array as your bootable system drive:

  • Set your BIOS to boot to CD first and boot from your Windows 2000/XP CD to load your operating system onto the array.
  • Windows will treat the array as one large drive and will install on the array just as it would on a single drive.
  • When you are prompted by Windows setup to press the F6 key to install SCSI or RAID drivers, you will need to press F6 and insert the driver disk that came with your RAID controller card.
  • Once the drivers for the card are installed you will be able to finish the installation of Windows 2000/XP onto the array. After the installation of Windows, please install the latest service pack for Windows to enable large drive support and avoid data corruption.

Note: Your system BIOS may require you to change the order of your boot sequence before you can boot your computer from a controller. For more information about adjusting options in your system BIOS, please contact the manufacturer of your computer or motherboard.

Read More

Intel RAID Controller Troubleshooting Guide: My RAID controller has an issue not addressed above

Check the following:

• Update the firmware files to the latest version. The files required depend of the server
board, but may include BIOS, BMC, FRUSDR, HSC. Clear the CMOS upon completing
any updates. Update the RAID controller to the latest version of firmware. Update files
can be downloaded from http://support.intel.com/support/motherboards/server.

• Download and apply the latest drivers used for your installation. These drivers may
include video, network adapter, SCSI, ATA RAID, chipset, and operating system drivers.

• Confirm that the processor(s) was installed correctly. If a single processor is installed, it
must be in CPU socket 1. When more than one processor is installed, they must be of
the same speed and voltage (and within one stepping). Do not attempt to overclock the
processors or other components on this system. Overclocking is generally not possible
and may damage components and void the warranty of your server board or other
components.

• Confirm that the memory is properly seated and that both the server board and RAID
controller memory is listed on the tested memory list.

• Calculate the power budget to ensure sufficient power is supplied. Power budget
information is usually included in the server board product guide or the technical product
specification. Information about the RAID controller power-draw is available in the RAID
controller hardware guide and is also available at
http://support.intel.com/support/motherboards/server.

• Verify that all chassis, power supply, and processor fans are properly installed and
functioning. If installed in a third-party chassis, verify that sufficient cooling is available.

• When using multiple PCI adapter cards in a PCI riser with more than one slot, populate
the slots from the bottom up. On systems without a PCI riser, see if your results vary by
moving the RAID controller to a different slot.

Read More